Tuesday, May 18, 2010
Cranberry Orange Scones
I think this is the yummiest scone recipe I have made so far in all of my time baking. I don't think it has anything to do with the fact that the recipe calls for three quarters of a pound of butter, do you?. That can't be why they are so buttery and melt in your mouth good!
The only change I made to the original recipe is that I did not use the glaze on the batch of larger scones, but I did use it when I made the mini scones. They tasted great with and without the glaze so you can decide which way you want to eat them. Enjoy!
Cranberry Orange Scones
Source: Barefoot in the Kitchen
4 cups + 1/4 cup all-purpose flour
1/4 cup sugar, plus additional for sprinkling
2 tablespoons baking powder
2 teaspoons salt
1 tablespoon grated orange zest
3/4 pound unsalted butter, cold, diced
4 extra large eggs, lightly beaten
1 cup heavy cream, cold
1 cup dried cranberries (or 2 cups fresh or thawed cranberries, quartered)
egg wash (1 egg beaten with 2 tablespoons water, milk, or leftover cream)
Glaze:
1/2 cup + 2 tablespoons confectioner's sugar
4 teaspoons freshly squeezed orange juice
Preheat oven to 400 degrees.
In a large bowl, mix 4 cups of flour, 1/4 cup sugar, baking powder, salt, and orange zest until combined. Add the cold butter and mix at the lowest speed until the butter is the size of small peas.
Combine the eggs and heavy cream in a small bowl. With the mixer on the lowest speed, slowly pour egg mixture into flour and butter mixture. Mix until just blended (the dough will look lumpy).
Combine the dried cranberries and the 1/4 cup of flour, add to the dough and mix on low until well blended.
Dump the dough onto a well-floured surface and knead. Divide dough in half. Roll half the dough in a 1-inch thick circle. Cut into 8 wedges, or use cutters or however you are dividing your portions. (I used a drinking glass.) Repeat with second half of dough.
Brush tops of scones with egg wash, sprinkle with sugar, and bake for 20-25 minutes until the tops are browned and the insides are fully baked. The scones will be firm to the touch. Allow the scones to cool for 15 minutes. Makes 16 scones.
For Glaze: Whisk together the confectioner's sugar and orange juice and drizzle over scones.
Labels:
muffins/scones
Friday, May 14, 2010
Lasagna
Who can resist a great lasagna recipe? B.etty Crock.er has gotten me through many a year with this standby lasagna recipe. I typcially make a few changes to the original recipe (like more cheese than they call for) but for the most part it is straight out of the cookbook. By they way, Italian sausage and ricotta cheese make a big difference in the overall taste of the dish so make sure you use those ingredients instead of a beef/pork sausage and cottage cheese substitute. Enjoy!
Italian Sausage Lasagna
Makes 8 servings
1 pound Italian sausage
1 medium onion, chopped
1 clove garlic, crushed
2 tablespoons chopped fresh parsley
1 teaspoon sugar
1 tablespoon chopped fresh or 1 teaspoon dried basil leaves
1 can (16 ounces) diced tomatoes, undrained
1 can (15 ounces) tomato sauce
12 uncooked lasagna noodles (I usually boil a few extra in case of rips)
1 carton (16 ounces) ricotta cheese
1/4 cup shredded parmesan cheese
1 tablespoon chopped fresh parsley
1 tablespoon chopped fresh or 1 1/2 teaspoons dried oregano leaves
4 cups shredded mozzarella cheese
1/4 cup shredded parmesan cheese
Cook sausage, onion and garlic in skillet, stirring occasionally, until sausage is brown; drain. Stir in 2 tablespoons parsley, the sugar, basil, tomatoes, and tomato sauce. Heat to boiling, stirring occasionally; reduce heat. Simmer uncovered about 45 minutes or until slightly thickened. (I usually never let it simmer that long.)
Heat oven to 350 degrees. Cook noodles as directed on package; drain. Mix ricotta cheese, 1/4 cup parmesan cheese, 1 tablespoon parsley and the oregano.
Lay four noodles on the bottom of an ungreased 9x13 baking dish. Spread with half of the meat sauce. Spread with half of the ricotta cheese mixture. Sprinkle about 1 to 1 1/2 cups of the mozzarella cheese over the top. Layer with four more noodles, the other half of the meat sauce, the other half of the ricotta cheese mixture, and another 1 to 1 1/2 cups of mozzarella cheese. Layer with the last four noodles, the remaining mozzarella cheese and the 1/4 cup of parmesan cheese.
Bake for about 30 minutes. Check and cover with foil if darkening too much. Bake for another 15 minutes. Let stand about 15 minutes before cutting.
Labels:
main dish
Monday, May 10, 2010
Iron Cupcake Challenge - Horchata Cupcakes
The Iron Cupcake Challenge visited Mexico this month. My first thought upon hearing our destination was chocolate and chile but I wanted to find a flavor that was a bit more unique. After asking friends and searching for Mexican flavor combos I was left with these two cupcake flavors, margarita and horchata. Most people have heard of a margarita and they are aware that it typically involves lime, salt, sugar, and alcohol. However, I'm sure many people have not been introduced to horchata. It is a drink that typically includes rice, almonds, cinnamon, milk, and honey. I was a bit skeptical at first, never having tried one before. Imagine my surprise when I went to purchase one and learned that it was a cold drink. In my mind I had been imagining it as a hot drink, similar to a hot chocolate. After sampling horchata from a local taqueria and another from a taco truck I decided to go ahead with the horchata flavor. And let me say right now, I am so glad I did!
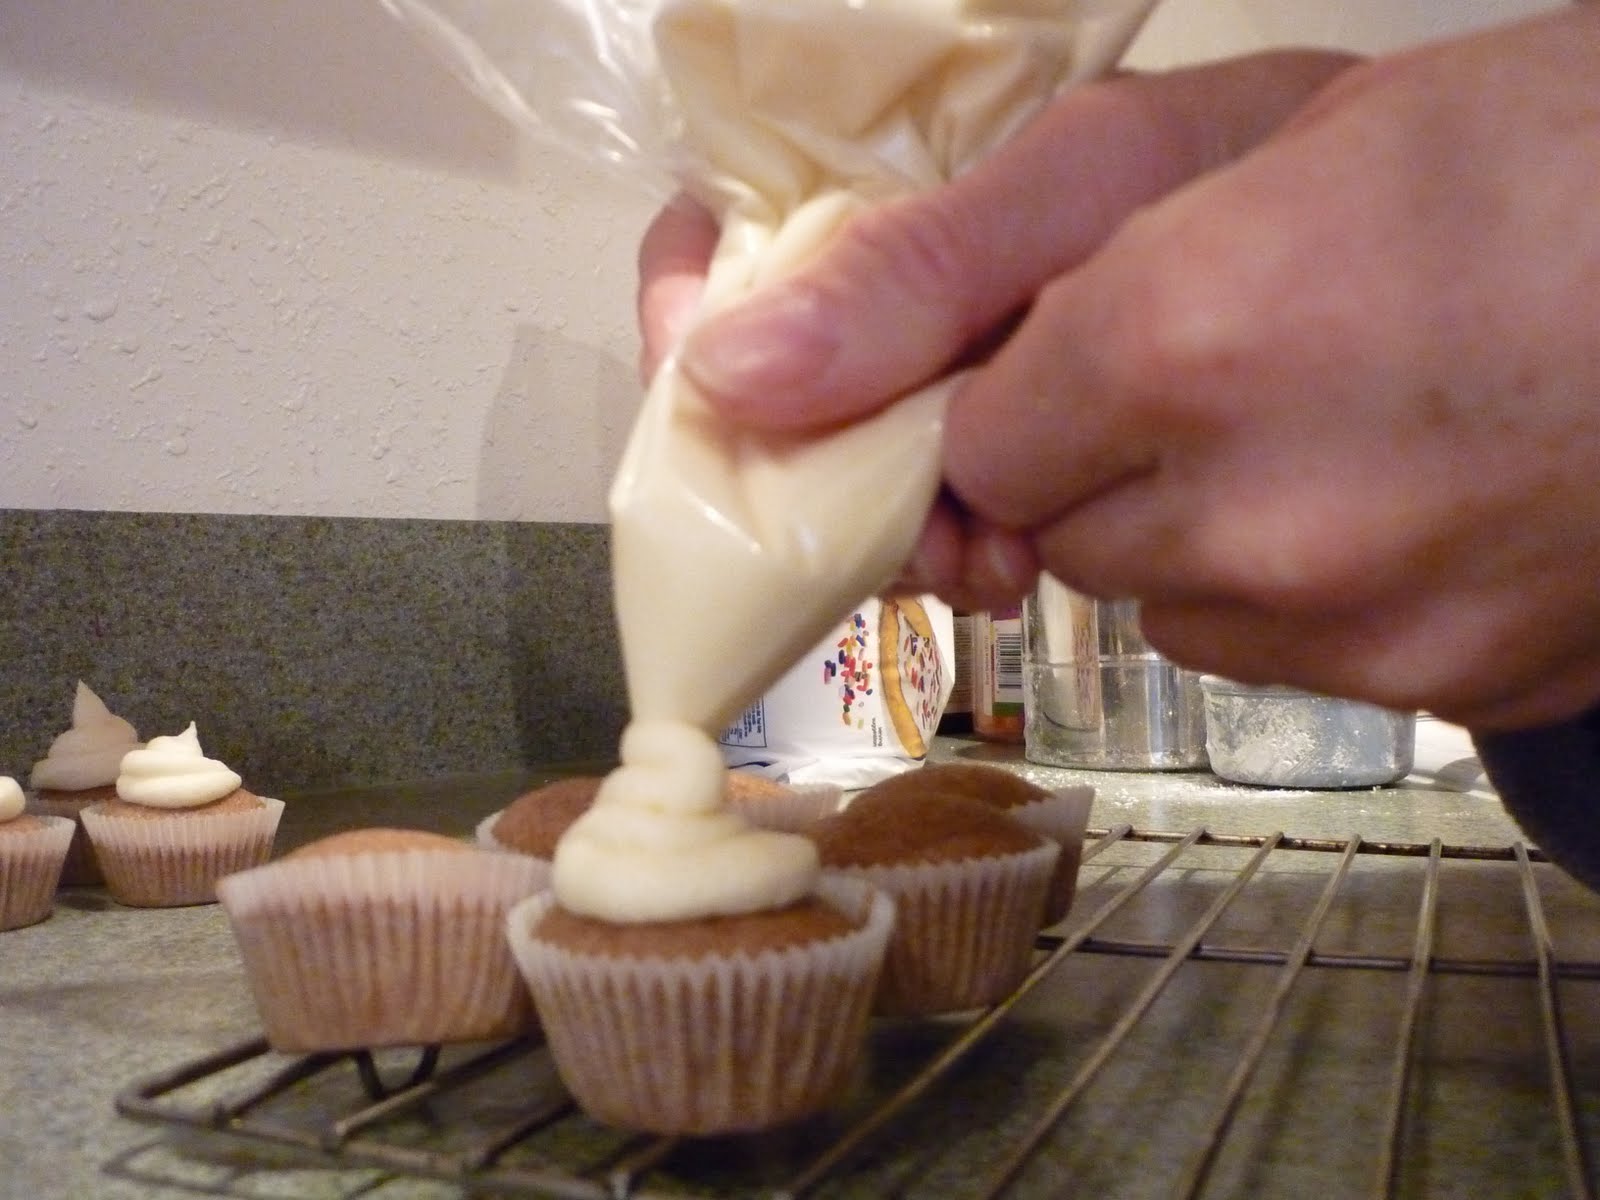
The cupcake has a cinnamon flavor, but there are subtle flavors of rice milk and almond mixed in. The cream cheese frosting is the perfect addition! These little guys just kept popping in my mouth; right out of the oven, cooled down that evening, the next morning, then with the frosting, later in the afternoon. Yikes! My husband was even talking about these the next day at work. I didn't make any changes to the recipe. I have included the recipe for homemade horchata but I used the one I bought from the taco truck. Enjoy!
Horchata Cupcakes
Source: The Pink Apron
2 1/2 cups all-purpose flour
1 1/2 cups sugar
1 teaspoon baking soda
1 teaspoon salt
1 1/2 level tablespoons cinnamon
1 1/3 cups safflower oil
1 cup fresh Horchata (see recipe below or purchase already prepared)
2 large eggs, room temperature
1 teaspoon white distilled vinegar
1 teaspoon vanilla extract
Preheat oven to 325 degrees. In a medium bowl, sift together the flour, sugar, baking soda, salt, and cinnamon. In a large bowl, gently beat together the oil, horchata, eggs, vinegar, and vanilla with a mixer. Add the dry ingredients to the wet and mix until smooth and thoroughly combined. Divide the batter evenly among the cupcake tins, filling about 2/3 full. Bake for about 12 minutes, rotating the pan about halfway through baking. Remove from oven and cool completely before frosting.
Cream Cheese Frosting
1 cup butter, room temperature
16 ounces cream cheese, room temperature
1 1/2 teaspoons vanilla extract
3 cups powdered sugar, sifted
Cream the butter and cream cheese on medium speed using an electric mixer. Add vanilla extract, mix in thoroughly. Gradually add the sifted powdered sugar and mix on low-med speed. Once all the powdered sugar is mixed in, put mixer on med-high speed and beat for a few minutes until light and fluffy. Pipe onto cooled cupcakes. Shake cinnamon over the top as a garnish.
Horchata
Makes 3 cups
1/3 cups (2.5 ounces) rice, medium or long grain rice will work
1/2 cup plus 2 tablespoons (3 ounces) blanched almonds
3 inch piece of cinnamon stick
1 1/4 cups hot tap water
1/2 cup turbinado (raw) sugar, plus more to taste
1 cup cold vanilla soymilk or almond milk
In a large bowl, combine the rice, almonds, cinnamon stick and water. Cool, cover and refrigerate overnight.
Pour the mixture into a blender or food processor, add the sugar and blend on high for several minutes, until the mixture is as smooth as possible – there will still be a hint of grittiness when you rub a drop between your fingers. Strain through a fine sieve, pressing on the solids until only a dryish pulp remains. Pour into a pitcher and add the milk. Taste and sweeten with more sugar to taste, if needed. Enjoy over ice.
Labels:
cupcakes
Wednesday, May 5, 2010
Peanut Butter Paisley Brownies
When making the oatmeal raisin cookies that I posted a few weeks ago I was also looking for a bar/brownie recipe that I could bake to accompany them to the homes of my friends. While scouring my baking cookbooks I came across a picture for Peanut Butter Paisley Brownies and thought they looked visually appealing and sounded different enough in ingredients from the cookies I was already baking. Not only that but I actually had all the ingredients on hand.
They were very easy to bake but I had difficulty swirling the batter for a marbled effect. Instead, as you can see from the photo, it ended up that the chocolate pretty much just covered the top layer. Oh well. Not every recipe can turn out like the photo in the cookbook, right? In case you hadn't guessed I am one of those visual people who always wants her food to look just like the picture. Ask my husband about Black Forest Cake and he'll have a story for you.
There is also an option to make Double Peanut Butter Paisley Brownies by adding peanut butter chips into the batter. If you want a stronger peanut butter flavor I would suggest adding the chips. While these brownies tasted good, there was not an overwhelming flavor of chocolate or peanut butter that I could detect. For me they were something that grew on me instead of a "wham these are great right out of the pan the very first bite" type of reaction. Enjoy!
Peanut Butter Paisley Brownies
Makes about 3 dozen brownies
1/2 cup butter or margarine, softened
1/4 cup peanut butter
1 cup sugar
1 cup packed light brown sugar
3 eggs
1 teaspoon vanilla
2 cups sifted all-purpose flour
2 teaspoons baking powder
1/4 teaspoon salt
1/2 cup (5.5 ounce can) chocolate syrup
Preheat oven to 350 degrees.
Blend butter and peanut butter in large mixer bowl. Add sugar and brown sugar; beat well. Add eggs, one at a time, beating well after each addition. Blend in vanilla. Combine flour, baking powder and salt; add to peanut butter mixture.
Spread half the batter in greased 9x13 inch pan. Spoon syrup over top. Carefully spread with remaining batter. Swirl with spatula or knife for marbled effect. (I found that half my batter didn't even fill the bottom of a 9x13 pan so I ended up putting all of it in, pouring the syrup over the top and trying to marble it with a knife. It ended blending instead of swirling.)
Bake for 35 to 40 mninutes or until lightly browned. Cool; cut into squares.
Labels:
brownies/bars
Saturday, May 1, 2010
Quiche Lorraine Scones
Don't these scones look mouth-watering and delicious? What's not to love about a flaky crust, melting swiss cheese, and salty bacon. I had a desire to bake scones one weekend so I started searching for a new recipe to try. I originally started out looking for a sweet, fruit type scone but once I came across these I knew I had picked my winner. I had never made a savory scone before and these were a great introduction.
They were easy to make, easy to clean up, didn't require a mixer and tasted fabulous. The only drawback is that it did take a bit of prep to cook the bacon, cube the cheese, and slice the green onions but that was so worth it for the result. I will definitely make these again. Enjoy!
Quiche Lorraine Scones
Source: Brown Eyed Baker
4 ounces swiss cheese, cubed
3 green onions, thinly sliced
7 strips of bacon, cooked and crumbled
2 cups + 1 teaspoon all purpose flour, divided
1 tablespoon baking powder
pinch cayenne pepper
dash nutmeg
1 teaspoon salt
8 tablespoons cold butter, diced
1/2 cup half-and-half
2 eggs
egg wash (1 egg beaten with 1 teaspoon water)
Preheat oven to 400 degrees. Line a baking sheet with parchment paper and set aside.
Prepare the cheese, onions, and bacon. Toss these ingredients together with one teaspoon flour; set aside.
In a medium sized bowl, combine the flour, baking powder, cayenne pepper, nutmeg, and salt. Cut in the butter with a pastry blender or two knives until the butter is pea-size. With a fork, lightly beat the half-and-half and eggs and add to the flour mixture. Add the bacon, onion, and cheese mixture. Using a wooden spoon, fold mixture until it begins to come together.
Turn out the dough onto a well-floured surface and knead gently for less than one minute. Pat dough to 3/4 to 1-inch thick and cut using 3-inch biscuit cutter (for large scones) or cut into square or triangles. Place the scones on the prepared baking sheet. Brush the tops of the scones with the egg wash.
Bake for approximately 20 minutes, or until golden brown.
Labels:
muffins/scones
Tuesday, April 27, 2010
Daring Bakers - Traditional British Pudding
The April 2010 Daring Bakers’ challenge was hosted by Esther of The Lilac Kitchen. She challenged everyone to make a traditional British pudding using, if possible, a very traditional British ingredient: suet.
The challenge this month was to make a traditional British pudding using suet as one of the ingredients. From the beginning I was nervous because I had never made, nor even seen a British pudding, and I had no idea what suet was. For those of you that are thinking the same thing here is a brief description of both.
Not being British it took me a bit to wrap my head around the fact that they use the word "pudding" to mean many different things. "Pudding" can be a black pudding and white pudding, a sort of meat and grain sausage. It is also used as a generic word for dessert. It also can be any dish cooked in a pudding bowl or pudding cloth, normally steamed or boiled but sometimes baked. And finally, as an endearment (for example, "How are you today my pudding?"). For this challenge the third meaning, a dish cooked in a pudding bowl or cloth, applies.
Now, on to suet. Suet is the hard but flaky fat found on the inside of a cow or sheep around the kidneys and that area of the body. Suet in its raw form crumbles easily into small chunks. It also melts at quite a low temperature, which has an effect on how it works in cooking. Suet can be rendered, which is basically melting it and then straining out any larger pieces, or it can be used in its raw form. So basically we would be making our own shortening.
For this challenge we were given the option of making a savory or a sweet pudding, and total control over the ingredients even to the point of substituting butter or margarine for suet. The method of cooking was the main component of this challenge and we were given the option to steam or boil the pudding. As I started pouring over recipes I realized that there were a lot of options. I also knew that I wanted to make a savory and a sweet. When I came across this video showing how to make Spotted Dick, a traditional British pudding, I knew I had to try it. It is basically a sweet spongecake with golden raisins shaped in the form of a log.
My second British pudding I decided to do a savory pudding with a suet crust. I poured over more recipes and there were a lot, let me repeat a lot, of recipes for steak and kidney pudding. While I know this probably would have been the most traditional I could have gone for I just could not bring myself to buy, cook, and eat kidney. So when I saw this video showing how to make a steak and mushroom pudding I opted for that instead. I did not render the suet, instead I just crumbled it onto the scale to make sure I had the correct amount. There was not much of a smell and it was basically white crumbs, but after crumbling it a bit I did start to get grossed out by the sound it made tearing off the little strips of connective tissue. I could tell it was similar to shortening even at that point when I went to wash my hands and it took hot water and soap to get the greasy feel washed away.
It was very easy to make and tasted delicious, almost like a meat filled pie, but I don't think I'll be making it again, at least not a savory pudding. The savory puddings with a suet crust have to be steamed for about 5 hours and I have learned that 5 hours of steaming is not good for my pocketbook nor my house. Why you ask? First off, my gas stove has got be cranked to about medium high to keep the water boiling which creates the steam, and having the burner on medium high for 5 hours straight uses way more gas than I would ever use to cook a meal. Secondly, I didn't realize that it would put so much condensation into the air that my 110 year old wood framed single pane windows would have water running down the glass and pooling up on the wood frames below. By the way, that process alone created quite the smell. The kitchen smelled great but you would walk out into the living room, dining room, and even our bedroom which is the farthest room away and wonder what the smell was. I realized after my second trip in that it was the wood on my windows releasing an unpleasant odor that only 110 years of being in existence could create. I could have used my slow cooker but there was no way that it would get water up to the boiling point and keep it boiling for the length of time needed to cook the pudding. So while my husband and I enjoyed the final product, we did not enjoy the cooking method as much.
My final pudding was decided on after I saw so many people post the yummiest looking photos of chocolate pudding. I had decided to steer away from chocolate since I do many other desserts with chocolate, but it called my name and since it was relatively easy to do I did it at the same time that the savory pudding was cooking. I'm sure having two steaming pots going, one for 5 hours and the other for about 1 hour, didn't help the dew point being reached in our house. I think that of the three this is the pudding that I would make again. Go figure, it was chocolate. It only took about 45 minutes to steam and it was like an individual serving of chocolate cake. A scoop of ice cream would have gone nicely but I only had a tall glass of cold milk to accompany it.
This post is already long as it is so I am just going to post the links where I got the recipes instead of actually typing out the entire recipe. Enjoy!
Recipe and Video for Spotted Dick
Recipe and Video for Steak and Mushroom Pudding
Recipe for Very Chocolate Pudding (I made only half of the recipe that is posted and it made two 8 oz. ramekin sized cakes)
Recipe and Video for Spotted Dick
Recipe and Video for Steak and Mushroom Pudding
Recipe for Very Chocolate Pudding (I made only half of the recipe that is posted and it made two 8 oz. ramekin sized cakes)
Labels:
cake,
daring bakers,
main dish
Friday, April 23, 2010
Oatmeal Raisin Cookies
I believe these may be my son's favorite cookie. He could have cared less about the chocolate peanut butter cookies and he does not mind chocolate chip or sugar cookies, but for some reason these oatmeal raisin cookies had him coming back for more and more and more and . . . I'm sure you get the picture.
I planned to bake a batch of these, divide them into three groups with a few leftovers for home, and deliver them to three friends. That was the plan. I ended up having a few more than I planned at home because a good portion of the batch baked up so differently than the others that I didn't think they were fit for public consumption.
I don't know if you can see in the picture above but I tried to line them up on the cooling rack in the order that they came out of the oven, first ones to the far right and last batch to the far left. Notice how the cookies on the far right are very thin, and I mean so thin that there were holes in some spots when I lifted them off the cookie sheets. They cooled to a hard crunchy cookie that still tasted good but their look was kind of blah. Yes, those are the cookies that remained at home. I couldn't bring myself to hand over cookies that looked less than desirable to someone outside of our house. The next row is a bit better, no holes but still very thin and crunchy. The third row were probably the best as far as looks and texture. The final row was very dense and they barely spread at all. My thoughts are that the butter somehow did not get distributed evenly throughout the dough and the first cookies had a lot of butter and the last cookies had a lot of oats.
Although they were yummy, I think I might just stick to the recipe on the back of the Quaker Oats box or look in my handy dandy cookbook for future oatmeal raisin cookies. Enjoy! (I didn't use walnuts since I was taking them to people and wasn't sure of nut allergies.)
Oatmeal Raisin Cookies
Source: Annie's Eats and Deborah's Culinary Confections
1 cup butter, softened
1 1/2 cups light brown sugar, packed
1/2 cup granulated sugar
2 eggs
1 teaspoon vanilla extract
1 3/4 cups flour
1 teaspoon baking soda
1/2 teaspoon salt
1 1/2 teaspoons cinnamon
1/4 teaspoon nutmeg
3 cups rolled oats
1 cup raisins
1 cup walnuts (optional)
Preheat oven to 375 degrees.
In a large bowl, beat butter, brown sugar, granulated sugar, eggs and vanilla until well blended. In a medium bowl, combine flour, baking soda, salt, cinnamon, and nutmeg. Add to butter mixtures, stirring until just combined.
Fold in rolled oats, raisins, and walnuts. Drop dough by rounded teaspoons about 2 inches apart on a cookie sheet.
Bake for 8-10 minutes or until edges are lightly brown. Cool 2 minutes and remove to wire rack to cool completely.
Labels:
cookies
Subscribe to:
Posts (Atom)
.jpg)

.jpg)
.jpg)