Between our family blog and food blog we have exceeded our photo space at our current address. Instead of throwing in the towel we have decided to move to a new address. These posts will all still be available (as far as I know) but any new posts will be at our new address.
You can follow along by clicking here: All Betz Off @ http://allbetzoffblog.wordpress.com/
Friday, November 23, 2012
Saturday, November 17, 2012
Potato and Canadian Bacon Chowder

Soups seem to be on our menu a lot lately. It must be the time of year, the weather, the idea of having a meal that is warm and cozy. Who knows. All I know is that most of these soups are easy to make, tasty, and filling.
I have made a few different potato soups in my day. I really like how this one is very chunky, not watery at all, and has the texture of the barley mixed in with the potatoes, carrots, and ham. I like soups that are more on the chunky side instead of the sipping side.
Easy, tasty, low cal. A winner all around. Enjoy!
Potato and Canadian Bacon Chowder
Source: Weight Watchers
2 cups uncooked potatoes, cut into 1/2 inch cubes
1 large uncooked carrot, diced
1 cup uncooked leek, white part only, chopped
1 clove garlic, minced
4 cups fat-free chicken broth
1/2 cup uncooked barley
1 bay leaf
1/4 teaspoon dried thyme, crushed
1/4 teaspoon black pepper
4 ounces Canadian bacon, cut into 1/4 inch pieces
1/2 cup fat-free evaporated milk
2 ounces fat-free half-and-half
In a slow cooker, combine potatoes, carrots, leek, garlic, broth, barley, bay leaf, thyme, pepper and bacon; cover and cook on low for 6 hours.
Stir in evaporated milk and half-and-half; heat through, uncovered, about 10 minutes.
Makes about 6 servings (1 serving = 4 points on weight watchers points plus)
Wednesday, November 14, 2012
Salted Caramel Sauce
.JPG)
Pumpkin carving in our house is not complete without caramel apples! As we get older we are less inclined to bite into a gooey apple covered in caramel. If we come across a caramel apple we often times will cut it into wedges so that we can neatly eat it. A few years ago, instead of making actual caramel apples to go with our pumpkin carving I just started making caramel sauce to dip our apples into. Much neater and very yummy!
Of course, I'm probably the one that eats the most apples with caramel. Hubby would be the next most likely and will usually wait for me to eat my portion and then he will finish off the pan. The little guy would rather just have the apple wedges and forget about the caramel. Again, sometimes I would wonder what family he belongs to if I hadn't given birth to this boy!
This sauce is very easy to make and tastes great! I haven't made a low fat/low cal caramel sauce before so I'm not sure if the somewhat grainy texture is due to not using a full fat cream or just the fact that I didn't wait long enough for the sugar to dissolve completely. Either way, texture aside the taste is amazing!
**One little side note: When you are waiting for the mixture to brown don't let it go too long. By about 8 1/2 minutes I was getting a little nervous because my mixture was not turning a brown/gold color. I gave it a quick stir and realized that all the color was happening beneath the top layer. Thank goodness it didn't burn while I was waiting for that top layer to turn color.**
Salted Caramel Sauce
Source: Weight Watchers
1/4 cup fat-free half-and-half
2 tablespoons light stick butter
1/4 teaspoon fine or coarse sea salt
1 cup sugar
3 tablespoons water
4 apples (Gala work great), cut into wedges
Combine half-and-half, butter, and salt in a small saucepan. Cook over medium heat until butter is melted and mixture is hot, about 2 minutes. Set aside.
Meanwhile, combine sugar and water in a large heavy saucepan. Cook over medium heat, stirring occasionally until sugar is dissolved, about 5 minutes. Increase heat to high and bring to boil, washing down sides of pan with pastry brush dipped in cool water to dissolve any sugar crystals. Boil, without stirring, until caramel turns dark amber, about 10 minutes.
Immediately remove saucepan from heat; let caramel cool 1 minute. Wearing long oven mitts to protect your arms and being careful to avoid any splatters, slowly whisk in half-and-half mixture, whisking until smooth. Transfer caramel to small bowl. Let stand, stirring occasionally, until thickened, about 15 minutes. Serve warm with apple wedges.
Makes about 6 servings (1 serving = about 4 teaspoons of sauce)(1 serving = 4 weight watchers plus points)
Monday, November 12, 2012
Butternut Squash Lasagna

Who knew that vegetables had some many uses! Well, I guess I did, but still . . . this was my first attempt at making a meatless version of lasagna and it turned out pretty well.
We had some friends over for dinner and one of our guests was vegetarian. Last time we had them over for dinner she ended up bringing a little something for her main dish. This time though I wanted to be able to make everything for dinner and not have to have her bring her own food. Since Fall is now here it seemed like the perfect opportunity to make a winter squash lasagna dish.
I wasn't sure how I should cook the squash. Some recipes called for baking it, some steaming it, some boiling. I tried microwaving it for a very short timeframe but soon gave up on that idea. I peeled it, cut it into chunks, and threw it in a pan with a bit of water to steam it soft. It worked great! Once the squash was steamed I threw it in the blender and pureed it smooth. All this was happening while the noodles were boiling.
It came together smoothly and tasted great. I think the leftovers may have been even better than the first round. Enjoy!
Butternut Squash Lasagna
Source: Weight Watchers
10 ounces uncooked lasagna noodles (about 12 noodles)
24 ounces butternut squash, peeled and diced into 1 inch squares
1/2 cup water
1/4 cup all-purpose flour
2 1/2 cups fat-free evaporated milk
2 cloves minced garlic
1/3 cup grated Parmesan cheese
1/8 teaspoon salt
1/8 teaspoon black pepper
1 cup shredded mozzarella cheese
1/4 golden raisins
1/2 cup dried cranberries
2 tablespoons chopped pine nuts
Preheat oven to 350 degrees F.
Boil lasagna noodles to al dente, according to package directions. Drain and set aside.
Place diced butternut squash into a large skillet. Pour 1/2 cup the water into the skillet and then cover and simmer over medium heat until the squash is tender, stirring occasionally, about 20 minutes. Cool slightly and then transfer the squash to a food processor/blender. Blend until smooth. Set aside.
Place flour in a small saucepan and very gradually whisk in milk and garlic. Warm over low heat, stirring constantly, until sauce simmers and is thickened, about 3 minutes. Remove from heat and stir in Parmesan cheese, salt and pepper.
Spread 1/4 cup of cheese sauce over bottom of a 9 x 13-inch glass or metal pan. Cover with 3 lasagna noodles; top with 1/3 of squash and 1/2 cup of cheese sauce. Sprinkle with 1/2 cup of mozzarella cheese and 1/4 cup of raisins. Cover with 3 more lasagna noodles and spread with 1/3 of remaining squash and 1/2 cup of cheese sauce; sprinkle with 1/4 cup of raisins. Cover with 3 more lasagna noodles and top with remaining squash and raisins; cover with last 3 lasagna noodles, pressing sheets firmly down. Top with remaining cheese sauce; sprinkle with pine nuts and remaining mozzarella cheese
Bake until lasagna bubbles around edges and is browned on top, about 30 minutes.
Makes 8 servings (1 serving = 9 points on weight watchers points plus)
Friday, November 9, 2012
Chocolate Chip Cheesecake
.JPG)
I have made many, many cheesecakes over the years. I have always shied away from any cheesecake recipe that uses low fat or fat free ingredients. I just always figured that if I'm eating cheesecake then I might as well en joy it. Right? I can't believe how wrong I was.
I decided to make a low fat cheesecake a few weeks ago for a potluck at work. I found the recipe while perusing the Weight Watchers site. Yep. Weight Watchers. I decided that I needed to reset my normal so this was one way to do it. I still wanted to provide a dessert so I decided to find a recipe that I could enjoy that also got rave reviews. This recipe fit that description on both accounts.
I was a little hesitant when I started making the crust and it didn't use any butter to bind the cookie crust. In all other cheesecake crusts I've made there is always a healthy dose of butter and sugar added to the cookie crumb mixture. I was afraid the crumb crust would move around when the batter was poured in, but I was pleasantly surprised when it stayed put in the pan.
The other thing I wasn't sure about was the mixture of fat-free and low fat cream cheese. I wasn't sure they were going to come together as well as they did. I've also never pureed cottage cheese but I was amazed at how smooth it became, almost like sour cream.
This recipe was easy to make and it tasted great! My husband and son ate it up even though at least one of them knew it was "diet" food. In fact, that one said that if this was healthier and tasted good I could make it any time. Enjoy!
Chocolate Chip Cheesecake
Source: Weight Watchers
10 cream filled chocolate sandwich cookies
8 1/2 tablespoons fat-free cream cheese
8 ounces low fat cream cheese
1 cup sugar
2 tablespoons all-purpose flour
1 cup fat-free cottage cheese
2 teaspoons vanilla extract
6 large egg whites
3/4 cup mini chocolate chips, divided
Preheat the oven to 325 degrees F. Lightly coat a 9-inch springform pan with cooking spray.
Crush cookies; spread evenly over bottom of pan.
Using a mixer, beat together the cream cheese on lowest speed until well blended.
In a small bowl, combine sugar and flour; add to cream cheese mixture and beat until smooth.
In a food processor or blender, puree cottage cheese until smooth. Add cottage cheese and vanilla extract to cream cheese mixture; beat until smooth. Add egg whites; beat until well blended. Stir in 1/2 cup chocolate chips.
Pour batter into prepared pan and sprinkle with remaining chocolate chips. Bake until cheesecake puffs and center is almost set, about 60 minutes.
Transfer to a wire rack and cool completely. Run a knife around sides of pan to loosen; release pan sides. Cover and chill overnight. Cut into 12 slices and serve.
Makes about 12 servings (1 serving = 6 points on weight watchers points plus)
Tuesday, October 30, 2012
Split Pea Soup

Oh no, another abandoned post! My poor neglected blog. I guess you can see what takes a back seat when life gets busy. :)
So . . . I tried a healthified version of split pea soup. I don't know that it was really a healthier version compared to my other split pea soup but it definitely did not involve pureeing the cooked peas to make it the typical smooth, thick pea green soup. Also noteworthy, this version has no meat. Just in case you missed that it is split pea and not split pea and ham. That is somewhat noteworthy for me because I really like ham in my split pea soup. Besides that though it was an enjoyable dish. Enjoy!
Split Pea Soup
1 1/2 teaspoons extra virgin olive oil
1 yellow onion, chopped
1 1/2 cloves garlic, minced
1 cup dried split peas, rinsed well
1/2 cup brown rice, rinsed well
1 bay leaf
7 cups water
2 carrots, chopped
2 stalks celery, chopped
1 potato, diced
2 tablespoons dried (or 4 tablespoons fresh) parsley
1 1/2 teaspoon dried basil
1 1/2 teaspoon dried thyme
1/3 teaspoon freshly ground black pepper
1 tablespoon sea salt
In a large pot over medium-high heat, saute the onion and garlic in the oil until the onions are translucent. Add the peas, rice, bay leaf, salt, and water. Bring to a boil and reduce heat to low. Simmer for 20 minutes, stirring occasionally. Add the carrots, celery, potato, parsley, basil, thyme, pepper, and salt. Simmer for 30 minutes until the vegetables are tender.
Makes 6 servings
Wednesday, October 24, 2012
Peach Tart

Pinterest, the treasure trove of ideas! A photo of miniature fruit tarts in teeny mason jar lids caught my eye right away. How can you resist something so small and cute? Individual portions, an unusual baking pan. This one definitely got pinned on my board.
I just had to find the perfect time to bake it. I didn't want to bake a whole batch and have all of them for just my little family to eat. I didn't have time during the summer between all of our trips to here and there. How about in the Fall? How about a dessert for book club? Perfect!
While my picture is nowhere near as cute as the one on pinterest (and the original blog post), it was very, very tasty. I would definitely make these again. Enjoy!
Peach Tart in a Mason Jar Lid
Source: Fat Girl Trapped in a Skinny Body
Pastry Crust:
Recipe from Ina Garten
2 cups all-purpose flour
1/2 teaspoon salt
1 tablespoon sugar
12 tablespoons cold unsalted butter, diced
1/2 cup ice water
Peach Pie Filling (recipe below - can be made ahead of time and refrigerated)
For the pastry, combine the flour, salt, and sugar in a bowl. Add the butter and blend until it is in small bits the size of peas. Pour ice water and mix just until the dough starts to come together. Dump onto a floured board and knead quickly into a ball. Wrap in plastic and refrigerate for at least 1 hour (or put it in the freezer for about 20 minutes).
Preheat the oven to 400 degrees F. Spray your mason jar lids with nonstick spray. (I also used parchment paper between the crust and the lid.) Pull clumps of dough (about 2 tbsp for each mini tart) from the large dough ball and smoosh them into each lid. Push the dough so it covers the bottom and sides of each lid.
Prepare the pie filling, if not already prepared.
Bake for 45 minutes to 1 hour, until the pastry is browned and the pie filling starts to set. Rotate the pan once during cooking. If the pastry puffs up in one area, cut a little slit with a knife to let the air out.
Peach Pie Filling:
5 cups diced peaches
1 cup sugar
1 teaspoon cinnamon
2 tablespoons all-purpose flour
1/2 of a lemon, juiced
Toss all of the ingredients into a large pot; mix until the flour is distributed evenly. Allow to sit for about 30 minutes. Turn the heat on medium-high. Stir occasionally with a wooden spoon. Bring mixture to a boil and lower to low/medium heat. Stir occasionally. Keep over the heat for about 30 minutes, until it begins to thicken. Pour into a container, cool, then store in the fridge until ready to use or pour into pastry crust.
*Can be made up to 2 weeks in advance and stored in an air tight container in the refrigerator.
Makes about 12 mini tarts
Saturday, October 20, 2012
Homemade Pesto and Pasta

First time ever making pesto from scratch! I'm pretty sure this may have been my very first time eating pesto. Ever.
I don't know why I've never eaten it before. I like the color green. I don't shy away from green foods. I guess I just didn't know what the flavor was going to be like.
That and I was a bit nervous seeing that steamed spinach was in the recipe. I can't seem to do steamed greens. Any kind of wilting for me just doesn't endear me to that food. I like crisp lettuce in my salads and I am picky with the veggies I steam.
The first serving was pretty good. The flavor was very mild, more garlic than anything. The next day though it was a bit stronger. I'm not sure if pesto gets stronger when it sits, but it definitely had more flavor. Flavor isn't a bad thing. Enjoy!
Pesto Sauce with Pasta
1 lb. spinach, lightly steamed
1 large package fresh basil, leaves only
1/4 cup extra virgin olive oil
1 large tomato or 2 Roma tomatoes
4 oz. Parmesan cheese, shredded
3 garlic cloves
salt to taste
1/2 cup chopped walnuts
22 oz. whole-wheat pasta, cooked
optional: chopped steamed vegetables (carrots, cauliflower, or broccoli)
Purée the spinach, basil, oil, tomatoes, Parmesan, garlic, salt, and walnuts in a high powered
blender. Toss with cooked pasta; sprinkle with extra shredded Parmesan
cheese. Add chopped steamed vegetables and toss.
Makes 8 servings
Wednesday, October 17, 2012
Dark Chocolate Raspberry Banana Bread

Isn't it funny how social media can take a fairly simple recipe and shoot it into stardom. I'm sure pinterest has launched more than one person into food blog success from such a posting. It was there that I ran across this little gem of a recipe.
I have made a few varieties of banana bread, some that have included chocolate chips, but I've never done dark chocolate or raspberries. It turned out to be very tasty and moist. My center had some trouble baking all the way through (the same as a few others) but it wasn't enough to distract from the deliciousness of the bread. My loaf probably doesn't look quite as beautiful as the original because I didn't add extra chocolate and raspberries to the top, but it still was a hit while we were on vacation to the happiest place on earth. Enjoy!
Dark Chocolate Raspberry Banana Bread
Source: Recipe Boy
2 cups all-purpose flour
3/4 teaspoon baking soda
1/2 teaspoon salt
1 cup granulated white sugar
4 tablespoons unsalted butter, room temperature
2 large eggs
1 1/2 cups mashed ripe banana (about 3 bananas)
1/3 cup plain low fat yogurt
1 teaspoon vanilla extract
1 cup dark chocolate chunks or chips
1 cup halved raspberries, tossed in 1 tablespoon all-purpose flour
Preheat oven to 350°F. Spray a 9x5-inch loaf pan with cooking spray.
In a medium bowl, whisk together the flour, baking soda and salt.
In a separate large bowl, beat the sugar and butter with an electric mixer at medium speed until well blended (about 1 minute). Add the eggs one at a time, beating well after each addition. Add the banana, yogurt, and vanilla; beat until blended. Stir in the flour mixture; just until moist. Don't over-mix. Stir in the chocolate chunks and then gently stir in the raspberries. If you want, you can sprinkle a few additional chocolate chunks and raspberries on the top.
Spoon the batter into the prepared pan. Bake for 50 to 60 minutes or until a wooden pick inserted in center comes out clean. Cool 15 minutes in the pan on a wire rack. Remove from pan and cool completely on the wire rack.
Makes one 9x5 inch loaf
Saturday, October 13, 2012
Snickerdoodles

Snickerdoodles are not one of those cookies that I often think of making but I'm usually so glad that I picked them to bake once they come out the oven. I don't know why we sometimes try to find complicated recipes that test our cooking and baking skills when we have some very delicious and simple ones to use.
I love how easy snickerdoodles are to make and how yummy they smell coming out of the oven. Truly a recipe worth keeping and using over and over again. Enjoy!
Snickerdoodles
1 1/2 cups sugar
1/2 cup butter, softened
1/2 cup shortening
2 eggs
2 3/4 cups all-purpose flour
2 teaspoons cream of tartar
1 teaspoon baking soda
1/4 teaspoon salt
1/4 cup sugar
2 teaspoons ground cinnamon
Heat oven to 400 degrees F. Mix 1 1/2 cups sugar, butter, shortening, and eggs. Stir in flour, cream of tartar, baking soda, and salt. Shape into 1 1/4- inch balls.
Mix 1/4 cup sugar and the cinnamon. Roll balls in mixture. Place 2 inches apart on ungreased cookie sheet. Bake 8 to 10 minutes or until set. Cool on wire rack.
Makes about 4 dozen cookies
Tuesday, October 9, 2012
Blueberry Scones

These scones were delicious! For the life of me I can't remember what blueberry scone recipe I used. I'm thinking that you could google blueberry scones and find a great recipe. I made these at the beginning of August and neglected to bookmark the recipe site. Oops!
Friday, October 5, 2012
Vegetarian Chili

I'm not one to shy away from meat so I definitely did not go searching for a vegetarian recipe. In fact, you can probably say that I was a bit skeptical that this was really going to be like chili. Chili, with no meat, just doesn't sound right.
Surprisingly it was very good! In fact, so good that we have made it more than once. Imagine that! Enjoy!
Vegetarian Chili
2 cans pinto beans, rinsed well
2 C water, for canned beans
1 C brown rice, rinsed well
1 diced yellow onions
2 cans tomato sauce
2 - 14.5 oz. cans diced tomatoes, with juice
1 tablespoon chili powder
1 tablespoon garlic powder
3/4 teaspoon sea salt
1/2 teaspoon pepper
1-2 bay leaves
In a large stock pot, combine 2 C water and canned beans. Add all the remaining ingredients, simmer for 1 hour, and serve.
Makes 8 to 10 servings
Monday, October 1, 2012
Triple Berry Smoothie

Another smoothie from our summer smoothie marathon! These remind me of the long summer days that were happening not so long ago. I wish I could go back in time just a few months because these long Fall days have already been long enough.
Triple Berry Smoothie
1/ 2 cup water
1/4 cup vanilla yogurt
1/2 cup frozen unsweetened strawberries
1/2 cup frozen unsweetened blueberries
1/2 cup frozen unsweetened raspberries
Place all ingredients in blender. Blend completely.
Thursday, September 27, 2012
Daring Bakers - Empanadas

Patri of the blog, Asi Son Los Cosas, was our September 2012 Daring
Bakers’ hostess and she decided to tempt us with one of her family’s
favorite recipes for Empanadas! We were given two dough recipes to
choose from and encouraged to fill our Empanadas as creatively as we
wished!
Back to the Daring Bakers challenges after a two month break and it feels good! Our September challenge was to make Empanadas. I had heard of these before but had yet to make one. Well, nothing like making both a savory and sweet version on the same day, right?
I wanted to make a savory version for dinner. This recipe was fabulous because it actually used things out of my pantry. Have you ever tried to make a recipe that says that it uses ingredients out of the pantry yet you run across something that just isn't in a normal person's pantry? I know that sounds a bit silly, but this recipe actually used things from my pantry. No extra trips to the store!
I chose to make the wheat flour Empanada dough and fill it with shredded chicken, black beans, pepper jack cheese, tomatoes, and cream cheese. Yum, yum, yum! The flavors melded together beautifully! The dough was a dream to work with. I didn't even use any extra flour because it wasn't necessary.


(By the way, the dog bone on top is in celebration of our dog's 8th birthday - the day of our Empananda smorgasboard!)
Savory Empanada Dough
3 1/2 cups all purpose flour
1 cup warm water
1/2 cup less 1 tablespoon of liquid fat (I used olive oil)
1 tablespoon dry yeast
1 teaspoon salt
1 teaspoon paprika
Sift the flour into a bowl. Make a well in the middle and add all of the ingredients. Mix with a wooden spoon until all of the ingredients have been incorporated.
Turn dough onto the counter and knead for 5 to 8 minutes. Shape into a ball and allow to rise covered with a cloth for 30-50 minutes before using.
While the dough is rising, mix up the filling.
Preheat oven to 350 degrees F. Grease and flour the pan (round or square, approximately 9x9). Divide the dough in half. Roll out bottom crust (it will be slightly larger than the top piece). Place bottom crust in pan; add filling. Roll out top crust; place on top. Pinch seam of top and bottom crust. Use extra crust for decoration on top. Pierce top crust with fork for venting; brush with egg wash.
Bake for about 45 minutes or until crust is golden brown. Remove and serve warm.
Empanada Filling
3 cups cooked chicken, shredded
1 can black beans, drained and rinsed
8 oz. pepper jack cheese, shredded
tomatoes, diced
4 oz. cream cheese, softened
***** ***** ***** *****
The apple pear empanada was also amazing! It tasted just like apple pie. I made the crust thin enough that it wasn't too bread like and was very similar to pie crust. It wasn't quite as flaky as my traditional pie crust but it was delicious. I would definitely recommend this! Enjoy!


Sweet Empanada Crust
Same recipe as above, just add 2 tablespoons of sugar to dry ingredients.
Apple Pear Filling
Source: Vegephant
2 apples
3 pears
2 tablespoons of agave nectar
1/2 teaspoon of cinnamon
1 teaspoon of sugar
1/2 teaspoon of salt
1 teaspoon of all-purpose flour
Cut apples and pears into slices or chunks. Mix together. Drizzle the fruit with agave nectar and mix thoroughly. Sprinkle the cinnamon, sugar, salt, and flour on the mixture. Mix and let set.
Monday, September 24, 2012
Blueberry Peach Smoothie
.JPG)
Blueberry Peach Smoothie
1/2 cup grapes, red or green
1 cup fresh blueberries
1 medium peach
1 cup ice cubes
Blend all ingredients until smooth.
Friday, September 21, 2012
Lemon Raspberry Muffins

Halfway through summer my mom retired from her job. You can't have a retirement without a celebration so we hopped up to Vancouver for a girls' getaway. Before leaving my boys at home I baked up a batch of fresh muffins so they would have something tasty for breakfast the few days they were on their own. We just happened to have enough that we could take a few with us too. I'm glad we did because they were so good! The recipe said that I would only get 12 but they must have used large muffin cups whereas I must have medium sized or something. I ended up getting more like 18. Like I said earlier, I sure am glad I did. Enjoy!
Lemon Raspberry Muffins
Source: Eating Well
1 lemon
1/2 cup sugar
1 cup nonfat buttermilk
1/3 cup canola oil
1 large egg
1 teaspoon vanilla extract
1 cup white whole-wheat flour or whole-wheat pastry flour
1 cup all-purpose flour
2 teaspoons baking powder
1 teaspoon baking soda
1/4 teaspoon salt
1 1/2 cups fresh or frozen (not thawed) raspberries
Preheat oven to 400°F. Coat 12 large (1/2-cup) muffin cups with cooking spray or line with paper liners.
Use a vegetable peeler to remove the zest from the lemon in long strips. Combine the zest and sugar in a food processor or blender; pulse until the zest is very finely chopped into the sugar. Add buttermilk, oil, egg and vanilla and pulse until blended.
Combine whole wheat flour, all-purpose flour, baking powder, baking soda and salt in a large bowl. Add the buttermilk mixture and fold until almost blended. Gently fold in raspberries. Divide the batter among the muffin cups.
Bake the muffins until the edges and tops are golden, 20 to 25 minutes. Let cool in the pan for 5 minutes before turning out onto a wire rack. Serve warm.
Makes 12-18 muffins (depending on size of muffin cups)
Tuesday, September 18, 2012
Peach Raspberry Smoothie

Summer isn't quite just a memory since we are still having warm, sunny weather. And for us, summer meant a smoothie marathon! What that means is that I will have a smattering of smoothie posts in between some other genres of food over the next few posts. I hope you get to try a few new flavors! You don't even need a high powered, expensive blender. We've made some of ours in an inexpensive $20 blender in the past (although now we have a workhorse blender).
This smoothie was delicious! I was surprised that it turned out so dark because with peach as the first word in the title of the recipe I was expecting it to be more orange or peachy in color. It had a great combination of flavors. We actually made two batches, one with honey and one without. I was served the one without and thought it tasted just fine, my husband though said that the honey did make it a bit tastier. Enjoy!
Peach Raspberry Smoothie
2 cups water
2 cups grapes, red or green
2 cups frozen unsweetened peaches
1 cup frozen unsweetened raspberries
2 tablespoons agave nectar or honey, optional
Blend all ingredients until smooth.
Makes 3 servings
Saturday, September 15, 2012
Oven "Fried" Chicken and Baked Beets

Yah! I have actually found some time to do some posts. I am so excited! Photos have just been sitting on my computer for a few months now, stacking up and making me feel guilty for neglecting my blog. I finally found some time to just sit and do nothing but watch a movie and get some posts written.
So, now that I'm back in the swing of things, here is another one of those main dishes where the picture doesn't look very appetizing but the food tastes pretty darn good! This was not a difficult recipe to make and I like the fact that it is baked, not fried. I guess that gives me some feeling of it being healthier even if it is isn't. We also baked some beets fresh from the garden. Yum! Enjoy!
Oven "Fried" Chicken
Source: Food Network
1 1/3 cups rice-corn crispy cereal (I used Crispex)
2 1/4 cups broken bagel chips
1 tablespoon canola oil
2 teaspoons salt
1/2 teaspoon cayenne pepper
1/2 teaspoon paprika
1/2 teaspoon freshly ground black pepper
1/2 cup light mayonnaise
1 teaspoon Dijon mustard
4 skinless chicken pieces, bone in or boneless (about 6 ounces each)
Preheat the oven to 400 degrees F. Set a rack on a foil lined baking sheet. Spray the rack generously with cooking spray.
Finely grind the cereal and bagel chips together in a food processor or blender. Transfer crumbs to a large gallon size plastic bag. Add the oil, salt, cayenne, paprika, and ground pepper and toss to mix thoroughly.
Whisk the light mayonnaise and Dijon mustard together in a medium shallow bowl. Add chicken to mayonnaise and turn to coat all the pieces evenly. Drop the chicken into the plastic bag, seal and shake until each piece is evenly coated.
Place coated pieces on the prepared rack. Bake until the coating crisps and browns and an instant-read thermometer inserted in the thickest part of the pieces registers 160 degrees F, about 35 to 40 minutes.
Transfer to a platter and serve hot or at room temperature.
Makes about 4 servings
Thursday, September 6, 2012
Peach Mango Smoothie

This summer we enjoyed A LOT of smoothies! Not only did we drink our usual, the green smoothie, but we actually branched out and tried a few different flavors. This one, and another similar variation, were two of the best. They definitely taste like summer! Enjoy!
Peach Mango Smoothie
1 cup water
1 mango, peeled, pitted
2 peaches, halved, pitted
1 tablespoon honey (you don't have to put this in)
2 cups ice cubes
Place all ingredients in blender. Blend thoroughly.
Makes about 4 cups
Wednesday, August 29, 2012
Three Cheese Potatoes

I really didn't intend to take that long of a blogging break, sorry! School is about to start up which means that I started doing stuff toward the beginning of August so my time became divided again between school, family, and everything else. Then in the middle of the month we went to Disneyland for 12 days, and upon our return it was time to jump into school full force. Not only am I getting my own classroom ready but our little guy is going to Kindergarten so it's a big transition for us all around.
We actually made these potatoes back in the beginning of the month but as I sit here typing up this post I told my husband that my mouth is watering just looking at this picture and thinking about these potatoes. They were so good! The recipe was a bit different than I initially thought. For some reason I was assuming these were like twice baked potatoes and each potato was wrapped in foil. It turns out that you cut all three potatoes and put them into one large piece of foil. Yes, I would have figured this out sooner had I read the recipe, but instead I looked at the picture and ingredients and had another idea in my head. Don't you love it when that happens? Then when you go to make it you think, whoa, wait a minute this isn't what I was thinking this would be. It turned out great though, and it made way more than 3 servings like I originally thought with three potatoes. Enjoy!
Three Cheese Potatoes
Source:Taste of Home
3 large potatoes, peeled and cut into 1-inch cubes
1 medium onion, chopped
3 tablespoons grated Parmesan cheese
1 tablespoon minced chives
1/2 teaspoon seasoned salt
1/4 teaspoon pepper
2 tablespoons butter
1/2 cup crumbled bacon
1/2 cup shredded part-skim mozzarella cheese
1/2 cup shredded cheddar cheese
In a large bowl, combine the first six ingredients. Transfer to a double thickness of greased heavy-duty foil (about 18 in. square). Dot with butter.
Fold foil around potato mixture and seal tightly. Grill, covered, over medium heat for 15-18 minutes on each side or until potatoes are tender.
Carefully open foil. Sprinkle the bacon cheeses over potato mixture. Grill 3-5 minutes longer or until cheese is melted. Open foil carefully to allow steam to escape.
Makes 4 to 6 servings
Wednesday, August 8, 2012
Dark Chocolate Hot Fudge Sauce

Summer just isn't summer until you have made at least one batch of homemade ice cream, right? I was torn between making a new flavor and going with a known great. I decided that since I was short on time I would go with what was known. You can find the recipe for for Candied Cherry and Toasted Almond ice cream here.
While I didn't make a new flavor of ice cream I did make a new topping to go with it. Ooey, gooey, dark chocolate hot fudge dripping down over yummy ice cream. It was a perfect combination. Enjoy!
Hot Fudge Sauce
Source: Brown Eyed Baker
2/3 cup heavy cream
1/2 cup Lyle’s Golden Syrup, or light corn syrup
1/3 cup dark brown sugar
1/4 cup Dutch-processed cocoa powder
1/4 teaspoon sea salt
6 ounces bittersweet chocolate, chopped, divided in half
2 tablespoons unsalted butter
1 teaspoon vanilla extract
In a 2-quart saucepan over medium-high heat, bring the cream, syrup, brown sugar, cocoa powder, salt and half of the chocolate to a boil. Reduce the heat to medium-low or low (enough to maintain a low simmer), and cook for 5 minutes, stirring occasionally.
Remove from the heat and stir in the remaining chocolate, the butter, and the vanilla extract, stirring until smooth. Let cool for 20 to 30 minutes before using (it will thicken as it cools). Store in a jar or airtight container in the refrigerator for up to 2 weeks. To reheat, microwave for 30 seconds to 1 minute until it’s pourable but still thick.
Saturday, August 4, 2012
Kiwi Watermelon Smoothie

Most mornings we have a green smoothie for breakfast. And while I am happy with that, I finally decided to open up the cookbook that came with our blender to take a look at some other flavor combinations. I happened to have watermelon in the fridge, and it wasn't the best for just eating plain so I thought I'd try it in a smoothie. I also didn't have any dates on hand so I decided to throw in a handful of raisins instead.
It turned out okay. It was pretty watery. My 5 1/2 year old son thought it was okay. He actually slurped it down pretty quickly (possibly because it was watery and not as thick as our usual smoothies), but I don't think it will be a repeat breakfast at our house.
Kiwi Watermelon Smoothie
1 1/2 cups watermelon, peeled and cubed
1 kiwi, halved, peeled
1 date, pitted (or a handful of raisins)
1 cup ice cubes
Place in blender in order listed. Blend completely.
Wednesday, August 1, 2012
Berry Surprise

Have you ever found an instance that you wish you could redo because your spouse always remembers it and brings it up? Yep, surprisingly this dessert is one of those things for me. Let me start at the beginning of this story.
Back when I was first married (maybe even before I was married) someone asked my husband what his favorite dessert was. I, in my naivete, was expecting him to say one of my signature dishes, apple pie, a cherry chocolate cake, you know, something like that. Nope. He tells them about some great dessert that was made many years before by a woman who was kind of like a foster mom to him. Not only did he mention it but he practically drooled while describing it. I was shocked. I was hurt. I was mortified. I was only 19 years old. Now in my much more mature years I have realized that he can have other favorites that haven't been made by me. I can tell you though that it has taken just about the 18 years of our marriage and me saying, "It's okay, you can say you like it even though it isn't mine" for him to feel like he can say he likes another person's dish. Okay, maybe it's not that extreme but sometimes it sure feels like it.
So anyway, for Father's Day this year I decided that I wanted to make his "favorite" dessert but put my spin on it. The recipe that I finally broke down and asked for a year or two ago was tweaked by me to use fresher ingredients and to shrink it down to a size manageable for three people.
The original recipe uses only blueberries in the form of canned pie filing, but I decided that I wanted to use fresh blueberries to make a homemade filling and I wanted to make a raspberry blueberry version. Graham cracker crust, cream cheese filling, a fresh fruit layer, and homemade whipping cream. Really what's not to love about it. Enjoy!

Berry Surprise
1 3/4 cup graham crackers, crushed (about 10 crackers)
1/2 cup butter, melted
Berry Sauce (see recipe below) or 1 can of pie filling
8 oz cream cheese, softened
1 cup powdered sugar
1 cup cool whip or whipping cream
Prepare berry sauce if using homemade.
Preheat oven to 350 degrees F. Grease an 8 or 9 inch baking pan (or 4 - 10 oz custard cups for a half size).
Mix the graham crackers and butter; set aside about 3 tablespoons of the mixture to spread over the top of the dessert); pat crust down in pan. Bake for 15 minutes (or about 10 minutes if using smaller portions). Remove from oven and cool crust.
Mix the cream cheese, powdered sugar, and cool whip. Spread over cooled crust.
Spread the berry sauce over the cream cheese mixture. Cover with remaining cool whip and sprinkle with remaining graham mixture.
Refrigerate for about 2 hours before serving.
Berry Sauce
1 1/2 cups blueberries (or equivalent amount of berries)
3/4 teaspoon cornstarch
1/8 cup water
Heat to boiling and simmer until sauce is thickened.
* A half batch of the entire dessert is enough for 4 - 10 oz custard cups. Double the recipe for a 9x13 pan.
Saturday, July 28, 2012
Daring Bakers - Crackers

Our July 2012 Daring Bakers’ Host was Dana McFarland and she challenged us to make homemade crackers! Dana showed us some techniques for making crackers and encouraged to use our creativity to make each cracker our own by using ingredients we love.
Whew! I made it before the end of July. I know Daring Bakers posts usually happen on the 27th of the month but I'm feeling pretty good about getting this challenge done and posted while still in the month of July.
This summer has been crazy busy for us. Basically the day after school got out for me we have been going, going, going. I didn't end up doing the June challenge and I thought I might not have time to make this one either but it turned out to be surprisingly easy. Sometimes just thinking about what the techniques are (especially if it is something new for me) and then what flavors to do take more effort than the actual act of making the item.Enough of the explanation on tardiness and on to the challenge.
This month we had to make homemade crackers using two different techniques. I'm sure there are other methods, but the three presented to us were hand shaping, using a pasta roller, or shaping into a log and slicing into coins. I don't have a pasta roller so I decided to make one batch hand shaped and another batch using the sliced icebox method.
Let's chat about the first batch, shall we. I decided to make the Health Crackers. I had just about everything necessary and they seemed to be easy enough to do. I did end up switching out ground flax seeds for the wheat germ since I don't usually have wheat germ on hand but plenty of ground flax. They came together quickly and I was planning to stick them in the fridge for their 20 minute rest until I realized it was almost 10 o'clock at night. I guess time got away from me, so I decided to leave it in the fridge over night and come back to it in the morning.


I did decide to get the second batch made and refrigerated as well. For that batch I decided to use one cup of cheddar cheese and one cup of Masdammer (similar to Swiss) which we picked up at a local dairy while out on our latest bike adventure. I used almonds instead of the walnuts suggested since my walnuts were old and yucky tasting. I again refrigerated them over night.


I did decide to get the second batch made and refrigerated as well. For that batch I decided to use one cup of cheddar cheese and one cup of Masdammer (similar to Swiss) which we picked up at a local dairy while out on our latest bike adventure. I used almonds instead of the walnuts suggested since my walnuts were old and yucky tasting. I again refrigerated them over night.


The next day I pulled out both batches of dough. The Health Crackers were not super pliable. They have to stay cold otherwise they stick but they don't stay together well if they are cold. Kind of a catch 22. I rolled out one quarter, brushed on the egg wash and then sprinkled with sesame seeds and coarse salt. They cut easily with a pizza cutter and they took about 30 minutes to brown up in the oven.

 The Cheddar, Almond, and Rosemary were easy to slice but they took much longer in the oven than the recipe stated. My crackers took about 20 minutes to bake but they were nice and crisp at the end of it. They break apart easily though so be careful where you eat these if you are worried about crumbs. Enjoy!


Health Crackers
3 cups rolled oats
2 cups all-purpose flour
1 cup wheat germ (I used ground flax seeds)
3 tablespoons sugar
1 teaspoon salt
2 cups all-purpose flour
1 cup wheat germ (I used ground flax seeds)
3 tablespoons sugar
1 teaspoon salt
3/4 cup vegetable oil
1 cup water
1 large egg white
1 cup water
1 large egg white
Cracker topping:
Sesame seeds, poppy seeds, nigella (onion) seeds, salt
Salt for sprinkling
Sesame seeds, poppy seeds, nigella (onion) seeds, salt
Salt for sprinkling
Mix the oats, flour, wheat germ, sugar and salt together in a large bowl or bowl for the standup mixer.
Combine the water and oil and stir into the oat mixture until it comes together and a dough forms.
Form dough into a disk and allow to rest in the fridge for about 20 minutes but up to a day if you are making them ahead.
Preheat the oven to 325°F. Divide the dough into quarters and work with one piece at a time, allowing the remaining pieces to stay in the fridge as you proceed with rolling out the crackers.
On a lightly floured surface, roll the dough to about 1/16 inch thick and transfer to a parchment lined baking sheet by carefully wrapping the dough around the rolling pin.
Brush the dough with the egg white mixed briefly with a tablespoon of water and sprinkle with seeds and salt of your choice.
Cut the dough with a pizza wheel and bake for 25-30 minutes until browned. Crackers that are not crispy once cooled may be returned to the oven.
Store in an airtight container and eat within two weeks.
Cheddar, Almond, and Rosemary Crackers
1/2 cup butter, well softened
1 tablespoon finely chopped rosemary
1 tablespoon finely chopped rosemary
2 1/4 cups grated aged cheddar cheese, firmly packed
1 cup plus 3 tablespoons all-purpose flour
1 teaspoon salt
1/2 cup finely chopped walnuts
1 cup plus 3 tablespoons all-purpose flour
1 teaspoon salt
1/2 cup finely chopped walnuts
Combine butter, rosemary, and cheese in a stand mixer and beat well (can also be done by hand). Add the flour, salt, and nuts and stir to combine.
Form the dough into two tight logs and wrap with cling film. Chill for at least an hour and up to several days. (The log can be frozen at this point for several months.)
Heat the oven to 325°F. Slice a log into 1/5 inch coins and place on a parchment lined baking sheet. Bake about 10 minutes until golden brown. (Mine took 20 minutes to get brown.)
Store in an airtight container and eat within three days.
Sunday, July 22, 2012
Strawberry Cobbler

There are not many people who don't associate cobbler with a feeling of warmth and goodness and a feeling of "home". I usually think about making cobblers in the fall, but who can resist a cobbler with the fresh fruit that abounds in the summer!
Mind you, there is much debate it seems about what is a cobbler versus a crisp. My personal definition is that a cobbler is a dough spread over a fruit mixture whereas a crisp is a mixture of granola, oatmeal or something of the sort and put on top of the fruit. Not a big difference, but a difference for sure.
I've had this recipe in my archives for quite a while, one that was borrowed from my stepmom after sampling one of her desserts. You can use many different fruits, but the original recipe is for strawberry (or strawberry rhubarb). The butter cookie topping sets it apart from a biscuit topping cobbler. Just make sure you don't substitute salt for sugar as I did in one of my cooking gaffs which resulted in us picking the salty dough off the fruit! Enjoy!
Strawberry Cobbler
2 pints fresh (or 24 oz. frozen) strawberries or 10 oz. each rhubarb and strawberries
1 tablespoon cornstarch
1/3 to 1/2 cup sugar
1 teaspoon vanilla extract
Stem and rinse strawberries. Leave small or medium berries whole, but halve if large. (If frozen you can defrost a bit but they don't have to be completely defrosted.) If using rhubarb, cut rhubarb into 1/2 in chunks.
Prepare Butter Cookie Dough Topping.
Adjust oven rack to lower-middle position. Heat oven to 375 degrees F.
Mix cornstarch, sugar to taste, prepared fruit and vanilla in bowl. Toss to coat. Place fruit in 8 or 9-inch baking pan (9x13 if doubling). Drop prepared dough onto fruit by heaping teaspoons.
Bake until golden, about 45 to 55 minutes (if doubling, about 2 hours).
Butter Cookie Dough Topping
1/2 cup all-purpose flour
1/4 teaspoon baking powder
pinch salt
1/2 cup unsalted butter, softened
1/2 cup sugar
1/2 large egg or 1 yolk
1/4 teaspoon vanilla extract
Mix flour, baking powder, and salt in small bowl; set aside. Beat butter and sugar until well blended. Beat in egg and vanilla. Add flour mixture; stir until just combined.
Wednesday, July 18, 2012
Breakfast Cookies

I made these breakfast cookies for our consumption while on a camping trip. I was so proud of myself for being ahead of the game and getting these baked right before we left but not so late that everyone was waiting on me. We each tried one for that morning's breakfast and then packed up the rest and hit the road. They were very yummy! They smelled just like an oatmeal cookie while baking in the oven.
You can imagine our disappointment then when two days into our trip some lovely individuals decided to steal all of our camping gear out of the back of our truck. These lovely gems were sitting in there with the other food items. I sure hope whoever got a hold them enjoyed them as much as we did!
They really were easy to make and I will definitely be making them again. You basically mix up all the dry ingredients, then mix up the wet ingredients and combine together. I used a pretty large cookie cutter to form the cookies (you can see that they are basically just a round ball and I don't think they spread much during baking because they didn't change their shape at all). Enjoy!

Breakfast Cookies
Source: Blueberry Girl
1 1/2 cups regular rolled oats
1/4 cup almond meal
1/4 cup almond meal
1/2 cup mixed nuts, finely chopped
1 cup coconut flakes
1/2 teaspoon salt
1 teaspoon cinnamon
1/2 teaspoon allspice
1 cup dried fruit (I used 1/2 chopped dried dates, and 1/2 raisins)
3 ripe bananas, mashed
1/4 cup sesame oil (many other oils can be substituted)
1 teaspoon vanilla extract
Preheat oven to 350 degrees F. Line baking sheet with parchment paper.
In a large bowl, combine rolled oats, almond meal, mixed nuts, coconut flakes, and salt. Stir in allspice and cinnamon. Add dried fruit and stir until evenly mixed. Make sure the dried fruit does not stick together in big chunks.
In another bowl, combine sesame oil, mashed banana and
vanilla extract. Pour wet ingredients over dry ingredients and stir until well
combined.
Take a large cookie cutter and press spoonfuls of the batter into it. Remove cookie cutter. Bake for about 20 minutes or until edges are golden brown.
Take a large cookie cutter and press spoonfuls of the batter into it. Remove cookie cutter. Bake for about 20 minutes or until edges are golden brown.
Friday, July 13, 2012
Flower Bouquets

I would have to say that while I love baking I don't know that I will ever open my own bakery. Holy cow! I had someone ask me if I could make 8 flower pot cookie bouquets to give as gifts and I agreed. Probably not the best idea while one is trying to wrap up the school year, finish report cards, organize records, and such.
The cookie baking didn't seem too difficult, although I had to bake them in much smaller batches than normal because of the sticks. The icing though was a bit of work. I think I stood hunched over the counter for four hours straight. Seriously! After about an hour in my little guy went to bed and my husband was gone for the evening so I decided to plug in Pride and Prejudice (just my 2 hour version, not the 6 hour one). I watched (you can put air quotes around watched for me) the whole movie and then the second half again. Just as I was finishing up the last cookie and my movie my husband walked in the door. I think it was about 11pm by that time and I was sooo ready for bed. It was a fun experience but I don't know if I'll be volunteering to do it again any time soon. Enjoy!
Every available counter space had cookies cooling or drying

For the sugar cookie and frosting recipe, click here.
Monday, July 9, 2012
Vanilla Cake with Vanilla Buttercream Frosting

Spontaneity at its best! The other day our son decided that he wanted to surprise Dad with a cake. Of course, he is too young to bake a cake by himself so he had to get me in cahoots with his surprise. It wasn't too difficult to say yes to such a cute little face and a heartfelt request. I can't tell yet if our son's love language is affirmation, physical touch, or giving gifts, but this is one example of how he likes to do things for others.
He made the request on Friday evening and it worked out perfectly because Dad had his volunteer shift for the police department the next day which meant that we could make his cake and present it to him at his mid-shift break without him even knowing about it. After Dad headed out for his first shift we figured out what type of cake to make. Our son wanted a road, police car, and the phrase "Good Job, Dad". He didn't know he needed to pick the flavor of the cake first. I gave him a choice from traditional flavors, chocolate, yellow, white. He decided that he thought Dad would like a white cake which was a bit disappointing for me because I am not a big fan of white cake. I quickly perused the internet and found a post that listed 50 of the best cupcake flavors. I started reading those and realized that I could make a white cake that was actually vanilla flavored; now that I could do.
The post that I mentioned that had the 50 different cupcake recipes linked to a Martha Stewart recipe which was showcasing a cupcake recipe from Billy Reece of Billy's Bakery in New York City. The recipe made 30 cupcakes but I figured that if I halved it I could bake a 9 inch square cake.
It was very easy to bake. In fact I whipped it up while our son was taking his nap. Immediately upon coming out of his room he told me that he decided he wanted "Crime" to be on the cake. I managed to convince him to keep the "Good Job, Dad" part on there and we could add a little part about "Helping Fight Crime". He was agreeable to this suggestion.
When it came to surprising Dad I was so afraid that he was going to drop the cake on the ground. Dad pulled up and wanted to come in the front door but I told him he needed to come around to the back. He thought that our son made some car/toy creation that he wanted to surprise him with. Instead he was surprised to see our son standing there holding the cake tray! Enjoy!
Vanilla Cake with Vanilla Buttercream Frosting
Source: Martha Stewart
1 3/4 cups cake flour, not self-rising
1 1/4 cups unbleached all-purpose flour
2 cups sugar
1 tablespoon baking powder
3/4 teaspoon salt
1 cup unsalted butter, cut into 1-inch cubes
4 large eggs
1 cup whole milk
1 teaspoon pure vanilla extract
Preheat oven to 325 degrees. Prepare pan; set aside. In the bowl of an electric mixer fitted with the paddle attachment, combine flours, sugar, baking powder, and salt; mix on low speed until combined. Add butter, mixing until just coated with flour.
In a large glass measuring cup, whisk together eggs, milk, and vanilla. With mixer on medium speed, add wet ingredients in 3 parts, scraping down sides of bowl before each addition; beat until ingredients are incorporated but do not overbeat.
Pour batter into pan. Bake, rotating pan halfway through, until a cake tester inserted in the center comes out clean, 25 to 30 minutes (17 to 20 minutes for cupcakes, longer than 30 minutes for 9x13).
Transfer to a wire rack to cool completely. Once cake has cooled, use a small offset spatula to frost cake. Decorate, if desired. Serve at room temperature.
Vanilla Buttercream Frosting
1 cup unsalted butter, room temperature
6 to 8 cups confectioners sugar
1/2 cup milk
1 teaspoon pure vanilla extract
In the bowl of an electric mixer fitted with the paddle attachment, cream butter until smooth and creamy, 2 to 3 minutes. With mixer on low speed, add 6 cups sugar, milk, and vanilla; mix until light and fluffy. If necessary, gradually add remaining 2 cups sugar to reach desired consistency.
Makes about 30 cupcakes or a 9x13 cake
Thursday, July 5, 2012
Honey Sesame Chicken

I like it when I find a recipe that tastes like something I have eaten at a restaurant. I don't know why, but for me there are not too many times that I have made teriyaki dishes that taste like something I would get at a little teriyaki restaurant. Usually too much soy sauce, or too salty, or not the right consistency. This dish though changes that.
I have already made this dish twice in the time it has taken me to get it posted from first trying it. The first time it was not as big of a hit. My husband liked it fine, but the boy and I did not like it so much. We followed the recipe exactly, which I knew would most likely be a mistake since I don't really like red pepper flakes added to things. It smelled great, but at first bite I knew it was going to be a bit hot for my tastebuds. I'm not sure why it says in the recipe that the pepper flakes add flavor but not heat, because they definitely add heat. I managed to muscle down a serving but hubby had to eat all the leftovers.
The second time we made it we left out the red pepper flakes. Oh, so much better (at least for my sensitive tastebuds)! Even the little guy liked this go round of it. This is a definite keeper in our recipe arsenol. Enjoy!
Honey Sesame Chicken
Source: Six Sisters Stuff
4 boneless, skinless chicken breasts
salt and pepper
1 cup honey
1/2 cup soy sauce
1/2 cup diced onion
1/4 cup ketchup
2 tablespoons olive oil
2 cloves garlic, minced
1/4 teaspoon red pepper flakes (optional - doesn't really add heat, just adds more flavor)
4 teaspoons cornstarch dissolved in 6 tablespoons water
sesame seeds
rice or noodles, already prepared
Season both sides of chicken lightly with salt and pepper; put into crock pot.
In a small bowl, combine honey, soy sauce, onion, ketchup, oil, garlic and pepper flakes. Pour over chicken. Cook on low for 3-4 hours or on high 1 1/2 – 2 1/2 hours.
Remove chicken from crock pot, leave sauce. Dissolve 4 teaspoons of cornstarch in 6 tablespoons of water and pour into crock pot. Stir to combine with sauce. Replace lid and cook sauce on high for ten minutes or until slightly thickened. Cut chicken into bite size pieces, then return to pot and toss with sauce before serving. Sprinkle with sesame seeds and serve over rice or noodles.
Saturday, June 30, 2012
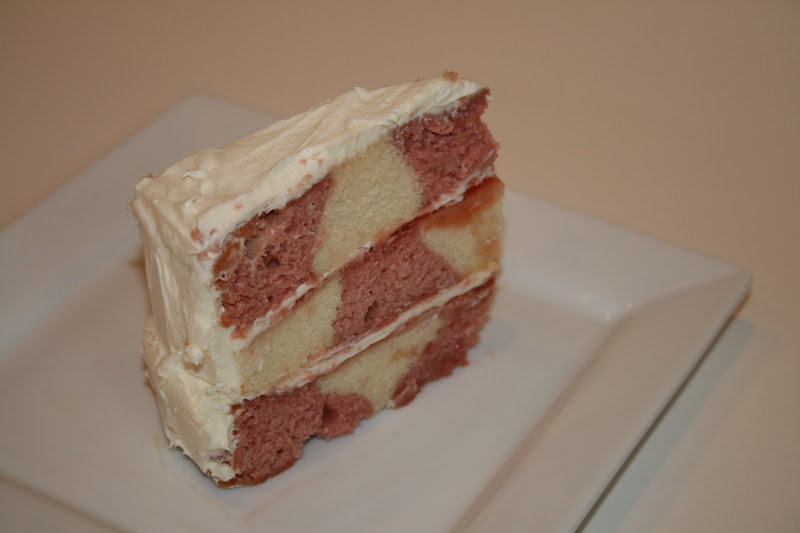
Strawberry Checkerboard Cake
.jpg)
I had another opportunity to try out a new recipe and serve it to unsuspecting people! Another baby shower, yes we've had a lot of babies born to our staff this year, and this time it was for a girl. The mom-to-be requested either a chocolate or strawberry cake. I really wanted to do something fun so I decided to make a checkerboard cake again. The only problem was that I knew the raspberry checkerboard turned out really well but I wasn't sure if changing up the fruit would make a difference in the cake. I remember researching checkerboard cakes before and there being mixed reviews about moist versus dry and everything in between. I was a bit nervous to monkey around with the ingredients but I decided to give it a go.
I followed the raspberry checkerboard recipe, just switching out strawberries for raspberries. The cake came together similarly, although the white cake spread a bit more than the strawberry so my checkerboard didn't turn out exactly like a checkerboard this time.


Personally I didn't like this strawberry cake as much as the raspberry cake. Everyone at the shower raved about it, but remember, they were unsuspecting having never had the raspberry version before. Both my husband and I who have had both like the raspberry better. There just seemed to be a bit more of a distinct flavor between the two with the raspberry checkerboard. Still, this one was pretty good too. Enjoy!
Strawberry Checkerboard Cake with White Chocolate Frosting
Cake:24 ounces frozen strawberries
1 cup strawberry syrup, such as Torani
4 cups cake flour
3 teaspoons baking powder
1 teaspoon salt
1 cup unsalted butter, at room temperature
2 cups sugar
4 eggs
1 tablespoon pure vanilla extract
1 cup whole milk
Frosting:
1/2 cup seedless strawberry jam
1 cup unsalted butter, at room temperature
2 - 8 ounce packages cream cheese, at room temperature
1/2 teaspoon almond extract
12 ounces white chocolate, melted and cooled to room temperature
1 cup powdered sugar
a few fresh strawberries for garnish
Tips: Spread the jam between layers very lightly to preserve the checkerboard effect.
Preheat oven to 325 F.
Lightly coat the cake pans with cooking spray and dust with flour. Set aside. In a medium saucepan over moderate heat, combine frozen strawberries and strawberry syrup. Bring to a simmer, reduce heat to low and continue cooking until liquid reduces by two-thirds.
Remove from heat and strain, pressing on the strawberries to release all the juices. There should be approximately 1 cup. Dispose of the strawberry pulp or reserve for another use. Add the food coloring, if using.
If there is more than 1 cup of juice, put in a small saucepan over medium heat and reduce to 1 cup; cool to room temperature. If there is less than 1 cup, add enough water to equal 1 cup.
In a medium bowl, sift together cake flour, baking powder and salt; set aside.
In the bowl of a stand mixer fitted with the paddle attachment, cream the butter and sugar until light and fluffy. Add the eggs one at a time, beating well after each addition. Beat in the vanilla extract.
Divide the batter in half. To one half of the batter, beat in the 2 cups of the flour mixture alternately with the milk to the batter, beating after each addition until smooth. To the remaining batter, beat in the remaining flour mixture alternately with the strawberry syrup to the batter until smooth.
Place checkerboard divider into one prepared pan. Then spoon in the two batters (red and plain) as described in "How to use your Checkerboard Cake Set."
Place all 3 pans in oven at same time. Rotate pans halfway through baking. Bake approximately 20 to 25 minutes, or until a toothpick inserted in the center comes out clean. Let the cakes rest in the pans, set on a rack, for 10 minutes. Place a cooling rack on top of each cake, invert the cake and remove the pan. Cool completely.
Using no more than 1/4 cup of jam, frost a very thin layer on top of one of the white cakes and on the strawberry cake.
In the bowl of a stand mixer fitted with the paddle attachment, cream the butter and cream cheese on high speed until light and fluffy, approximately 5 minutes. Beat in the almond extract. Reduce the speed to low and carefully drizzle the chocolate into the cream cheese. Increase the speed to high and beat until light and fluffy, about 2 minutes. Add powdered sugar and beat until well incorporated.
Spread a thin layer of frosting on the jam-covered white cake. Place the strawberry cake on top of this cake and spread a thin layer of frosting on top. Place the last white cake on top. Frost the sides and top of the checkerboard cake. Refrigerate until ready to serve.
Subscribe to:
Posts (Atom)