CLICK HERE FOR FREE BLOGGER TEMPLATES, LINK BUTTONS AND MORE! »

Saturday, November 27, 2010

Daring Bakers - Crostata


The 2010 November Daring Bakers’ challenge was hosted by Simona of briciole. She chose to challenge Daring Bakers’ to make pasta frolla for a crostata. She used her own experience as a source, as well as information from Pellegrino Artusi’s Science in the Kitchen and the Art of Eating Well.

What perfect timing for a daring bakers challenge! I have put off baking goodies for most of this month because we've been watching our waistlines. I also knew the holidays were coming up and there would be plenty of excuses for me to bake. I was so excited that I would be able to use this challenge in my Thanksgiving festivities!

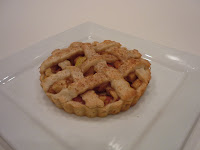
I made both a Caramel Apple Crostata and an Apple Cranberry Crostata. They were both easy to make and delicious! Even though they look very similar to my traditional apple pies the crust is very different. While my usual pie crust is light and flaky, this crust is more dense like a shortbread. It was delicious but it definitely tasted like shortbread to me and since I love my pie crust recipe I probably won't make a crostata like this again. When I make another it will be filled with pastry cream and fresh fruit which I think will go wonderfully with the shortbread.

For the crust, I used the first version of the pasta frolla that was offered to us in this challenge. If you'd like the recipe, email me. I did have to add a teeny bit of water after everything was mixed together because it seemed a tad bit dry like things were not going to mix/stick together well.


I added cranberries to half of the apple mixture and I drizzled caramel over the other half of the mixture once it was in the tart shells. I also chose to make two of the crostatas with a lattice top and two with a star cut out of dough. They turned out great! Enjoy!


Monday, November 22, 2010

Filled Cresent Rolls


Have I ever mentioned that my son is preschool age? Along with that, have I ever mentioned that I am a teacher? No. Well, preschool age son and a mother who is a teacher add up to schooling happening at home (at least for now). And as preschool lessons can be a bit hands-on, sometimes our food choices go along with what he is doing for preschool. Enter exhibit A, pizza filled crescent rolls.

How many of you have crescent shaped objects in your home? Not many, I bet. When I saw that this was our shape for the week (and we usually go on a scavenger hunt to find items in our shape of the week), I started wracking my brain to come up with something. I thought about croissants because I think they are on my top 100 list, but I figured that they were more time consuming than I wanted and my almost 4 year old would most likely not appreciate all the effort they required. Crescent rolls were the next best thing.

I wanted to make it fun and I figured he wouldn't likely eat a ham and cheese filled roll, so we went with a pizza filling. Pizza sauce, pepperoni, and cheese. Yes, I know, it's not original but it does suit what a preschooler would find exciting.

Along with a savory roll we also made our dessert out of crescent rolls.  I know the photo below is not super appetizing (I know what comes to mind when I look at the picture but I'll refrain from mentioning it on here), but it did actually taste pretty good. We cut up pieces of a snickers bar and then placed a few inside the crescent roll. They then melt into ooey, gooey yumminess while the roll is baking. I know this post is definitely not showcasing gourmet, as most of mine are not, but it was definitely a hit for the preschooler in our house and that was the intended audience! Enjoy! 


Tuesday, November 16, 2010

Pumpkin Pancakes


These pancakes got rave reviews when we had them on Halloween morning! I had made regular, buttermilk, apple, and blueberry pancakes but had yet to make a pumpkin variety. I thought that since our pumpkin carving would be taking place later that afternoon pumpkin pancakes would be a great way to start the day. My son loved them! He asked for seconds, thirds, and fourths. We sprinkled a bit of powdered sugar on some, and drizzled maple syrup on others. Both seemed to go over well and they went down without a fight!
The batter started out a bit thicker than I like so I added a bit of buttermilk to thin it out.
Enjoy!

Pumpkin Pancakes
Source: Pinch My Salt

1 cup whole wheat flour
1/2 cup cake flour
1 teaspoon baking soda
2 teaspoons baking powder
1/4 teaspoon salt
1 teaspoon ground cinnamon
1/2 teaspoon ground ginger
1/2 teaspoon ground nutmeg
1 cup buttermilk
1 cup pumpkin puree (can use canned puree)
2 eggs
2 teaspoons oil
1 teaspoon vanilla
2 teaspoons dark brown sugar

In a large bowl, whisk together the first eight ingredients (the whole wheat flour through nutmeg). In a separate bowl, whisk together the remaining ingredients (buttermilk through brown sugar). Mix wet and dry ingredients together, just until combined. (If batter is a bit thick, add buttermilk.)

Drop pancakes onto a medium-hot griddle. Pancakes are ready to flip when the edges start to turn dry and it looks like small bubbles are forming on the surface.

Wednesday, November 10, 2010

Dirt Cupcakes


For some reason I love making dirt cupcakes, especially in the Fall! Last year, at the end of October I made cupcakes that were decorated as spiders, pumpkins, and dirt. While the others were laborious and time consuming, the dirt cupcakes were easy and fun. I decided that this year I wasn't going to mess around with difficult decorations and instead just went straight to fun!

You can either use a box cake mix or make them from scratch. I have used both. This year, for the sake of time, I went with box mix. I made two batches, one yellow cake and the other chocolate. Yes, I used the frosting in a can because sometimes it's just easier. After frosting both sets of cupcakes, I set a gummy worm in the middle and then sprinkled crushed up chocolate animal crackers over the top. The animal crackers worked great. Last year was a disaster. I couldn't find plain chocolate cookies so I instead bought oreos. Unfortunately, when you crush oreos the filling still shows white and all the cookie crumbs stick together. I ended up scraping the filling out of the oreos and crushing just the cookies. Like I said, this year was much easier. Thank goodness for chocolate animal crackers! Enjoy!

Saturday, November 6, 2010

Macaroni and Cheese


When my son is asked what he would like for a "fun" dinner during our meal planning I can usually count on my one hand the choices that he will pick from. If he had free reign over his meals they would consist of chicken nuggets, hamburgers, pancakes, hot dogs, or macaroni and cheese. I guess that's why God created parents.

We don't often have macaroni and cheese because we still don't do a lot of dairy in his diet, but since we are nearing his birthday (and we usually try a bit of dairy around then) I decided to add it to our menu. I am not a huge fan of the box type mac and cheese, so I decided to go all out and use a recipe from my copy of The P.ioneer Woman Cooks, a recipe that is about as far from the box stuff as you can get.

You can either use all cheddar cheese in this dish, or you can mix and match any cheese you want. I decided to do a 1/2 pound of cheddar, a 1/4 pound of monterey jack, and a 1/4 pound of pepper jack. I swear, that 1/4 pound of pepper jack should not have as big of an influence on those 8 servings of pasta, but holy cow, it did! Not only that, but it resulted in my son not eating more than one bite before stating that he didn't like the black stuff (ground pepper) in his dinner. It was really the pepper jack cheese but I wasn't about to admit that to him. On a happier note, he ate the leftovers the next day no problem, and I was amazed at how much more tame the pepper jack cheese was the second time around.

I believe you can find the recipe on her website, but mine came from her cookbook. Enjoy!

Macaroni and Cheese
Source: The Pioneer Woman

4 cups dry macaroni
1 egg, beaten
1/4 cup butter
1/4 cup all-purpose flour
2 1/2 cups whole milk
2 heaping teaspoons dry mustard
1 pound cheddar or other desired cheese, grated
1/2 teaspoon salt
1/2 teaspoon seasoned salt
1 teaspoon ground black pepper

Cook the macaroni until very firm. The macaroni should be too firm to eat right out of the pot. Drain. (If you're in a hurry and don't want to bake the macaroni and cheese, cook it until it's done.) 

In a small bowl, beat the egg.

Preheat the oven to 350 degrees and grease a large baking dish. (I used a 9-inch square pan.)

In a large pot, melt the butter and sprinkle in the flour. Whisk it together over medium-low heat. Cook for 5 minutes, constantly whisking. Don't let it burn.

Pour in the milk. Add the mustard and whisk until smooth. Cook for 5 minutes or until very thick, whisking constantly. (We had to cook it for much longer than 5 minutes and finally turned the heat up to medium-high or high, whisking constantly, in order to get it to thicken.) Reduce the heat to low.

Slowly pour 1/4 cup of the sauce into the beaten egg, whisking constantly to avoid cooking the egg. Whisk until smooth. Pour the egg mixture back into the sauce, continuing to whisk. Add in all but 1/2 cup of the cheese and stir until melted. Add the seasonings. Taste the sauce and add more seasonings as nbeeded.

Pour in the cooked, drained macaroni and stir to combine. Pour into the baking dish and top with remaining cheese. (If you fully cooked the macaroni in the first step, then serve immediately.)

Bake for 20 to 25 minutes or until bubbly and golden on top.

Monday, November 1, 2010

Chocolate Zucchini Bread


Do you like chocolate? If so, you will love this recipe! Yes, it is zucchini bread, but after you take a bite it's pretty hard to convince yourself that it is healthy, because it certainly does not taste like it. And let's be honest, even though it has zucchini as an ingredient it's probably not the most healthy of breads out there! Cocoa powder, sugar, ooey gooey chocolate chips . . . and if you add a scoop of vanilla ice cream to it (which I may or may not have done) it sends it over the top. Enjoy!

Chocolate Zucchini Bread
Makes one 9x5x3 inch loaf

1 1/2 cups shredded raw zucchini
1 cup all-purpose flour
1/2 cup unsweetened cocoa powder, sifted
1 teaspoon baking soda
1/4 teaspoon baking powder
1/4 teaspoon salt
1/2 teaspoon ground cinnamon
1/4 teaspoon ground allspice
1/2 cup safflower or canola oil
1/2 cup granulated sugar
1/2 cup light brown sugar
2 large eggs
1 teaspoon pure vanilla extract 
3/4 cup semi-sweet chocolate chips

Preheat oven to 350 degrees and place rack in the center of oven. Grease a 9x5x3 inch loaf pan. Set aside.

In a separate bowl, whisk together flour, cocoa powder, baking soda, baking powder, salt, ground cinnamon and ground allspice. Set aside.

In the mixer, beat the oil, eggs, and vanilla extract until well blended (about 2 minutes). Fold in the grated zucchini. Add the flour mixture, beating just until combined. Then fold in the chocolate chips. Scrape the batter into the prepared pan and bake until the bread has risen and  a toothpick inserted in the center comes out clean, about 55 to 65 minutes. Place on a wire rack to cool for about 10 minutes, then remove the bread from the pan and cool completely.