
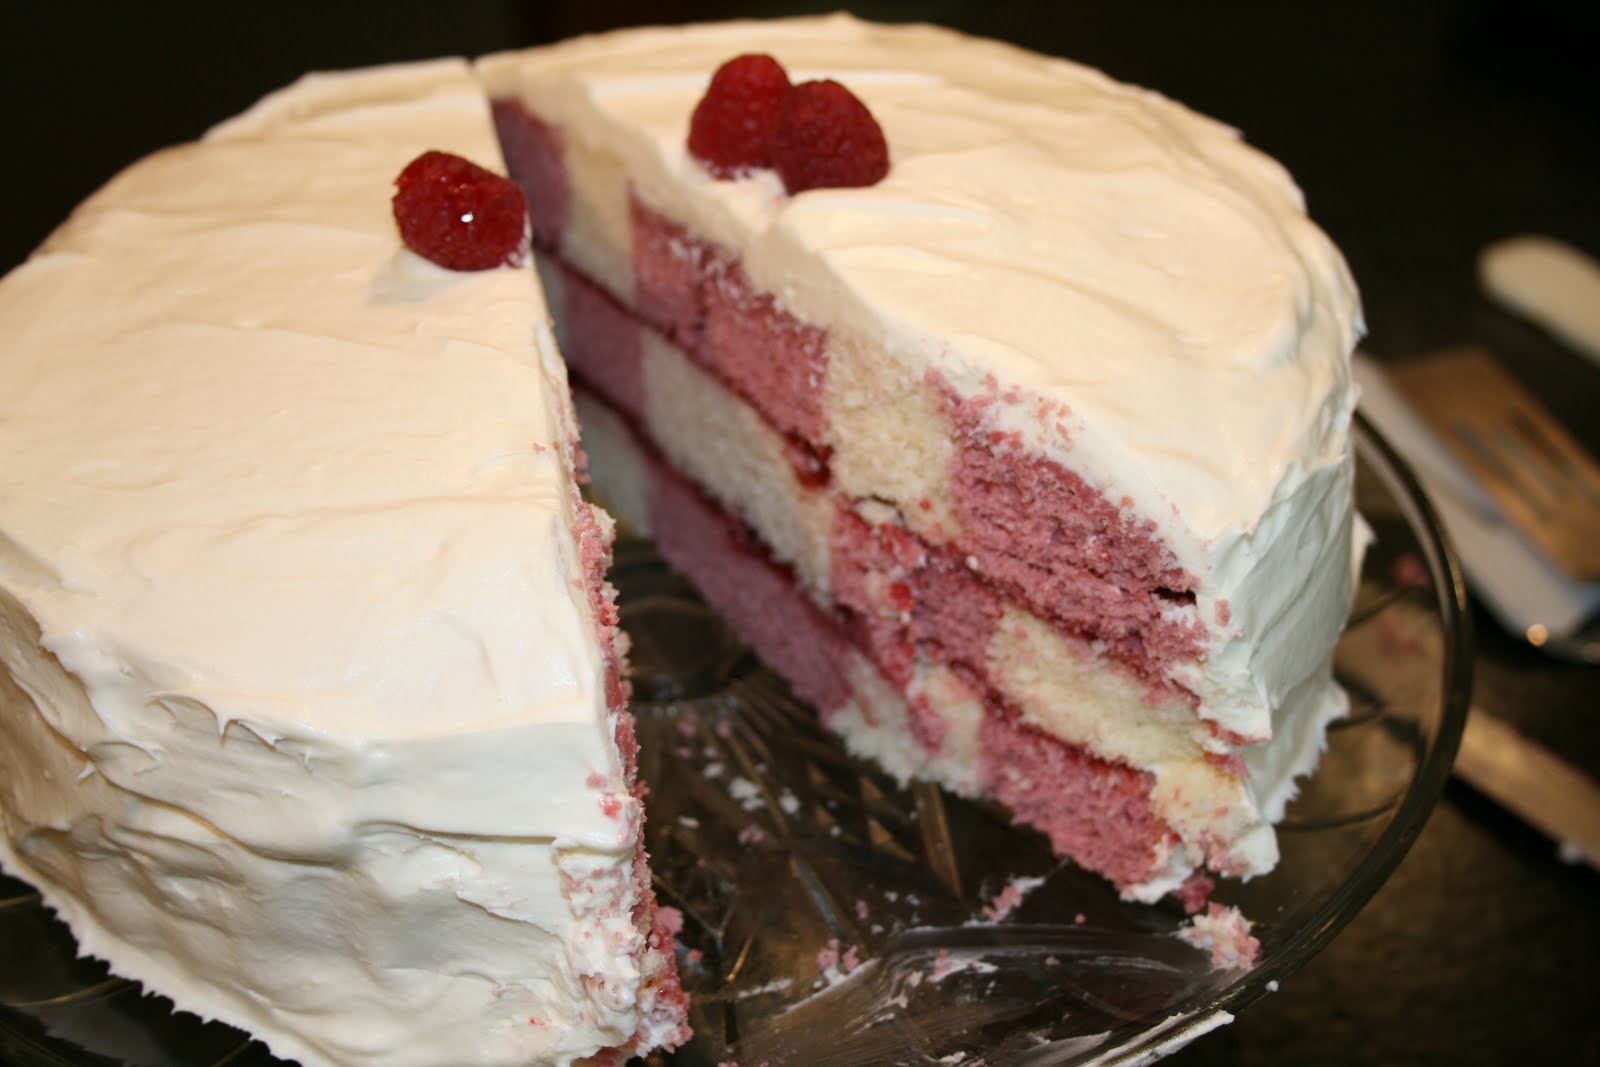
The beauty of this cake is that it looks simple and unassuming, yet it is not until you slice into the layers that you get a peek into the incredible design that is awaiting you. I really had a hard time deciding on the particular recipe to use for my first checkerboard cake. So many of the recipes out there (even the one that came with my pan set) are for a chocolate and yellow checkerboard cake. While I am perfectly okay with chocolate and yellow cake together (it is one of my favorite flavor combos for cake and frosting) I wanted something a bit different and a bit more summery. This particular checkerboard cake was going to our end of the year MOPS bash and I wanted it to reflect the summer theme we had chosen.
What a challenge finding a recipe though and feeling confident with it. I read so many reviews of checkerboard cake recipes that had some touting it as the best thing on earth and then others saying it was beautiful but the driest cake they had ever eaten. Couldn't there be a happy medium? Couldn't there be a cake that tastes great, is moist, and looks beautiful? Sometimes you just don't know until it comes to show time.
I had my doubts that this cake was going to turn out right from the beginning. The very first step is to cook down the frozen raspberries and raspberry syrup into a thick-ish syrup. I always doubt myself when it comes to the thickness of syrup necessary for my recipes. That and I really have little patience for waiting for raspberries (or any fruit) to break down and thicken up over the stove top. I guess it would help it I didn't wait until late in the evening before starting the recipe. I had good intentions of doing this step well before I needed to mix and bake the cake but as usual I let time get away from me. So, back to the syrup. It took a while for the raspberries to break down. Once I had enough of waiting I ran the sauce through a sieve to separate out the sauce and the seeds. It was supposed to yield me one cup of syrup. The fact that I had two cups of syrup meant that I hadn't broken it down near enough. So back on the stove top it went. This time I boiled and boiled and boiled the syrup until it looked like it was close to 1 cup. Voila! It measured at exactly one cup. However, it was now after 10 o'clock at night and there was no way I wanted to mix a cake I had never made before that required some technical components and bake it before bed. Instead I set my alarm for EARLY in the morning to finish.

Early the next morning I set out to mixing up the batters. It was a surprisingly easy process. The basic batter was the same, it was then divided in half (which I used my scale to do). To one half I added milk and 2 cups of the flour, to the other half I added the raspberry syrup and the other 2 cups of flour. I could tell that the batters were very different as far as texture was concerned. When I got them in the pan they were insanely different. This was the second time that I thought this cake was doomed. You can see the variations in texture between the pink and white circles even after the cake was done baking.

Since I was short on time I stuck them in the freezer to cool completely. After they were cool I added a thin layer of raspberry jam to one of the pink layers and then the white layer. I decided not to shave the tops to even the layers so I ended up stacking the bottom two layers top to top. Meanwhile I whipped up the white chocolate frosting. This was the third time that I thought this cake was doomed. It seemed as though the frosting was going to be way too thin but it ended up holding its form nicely.

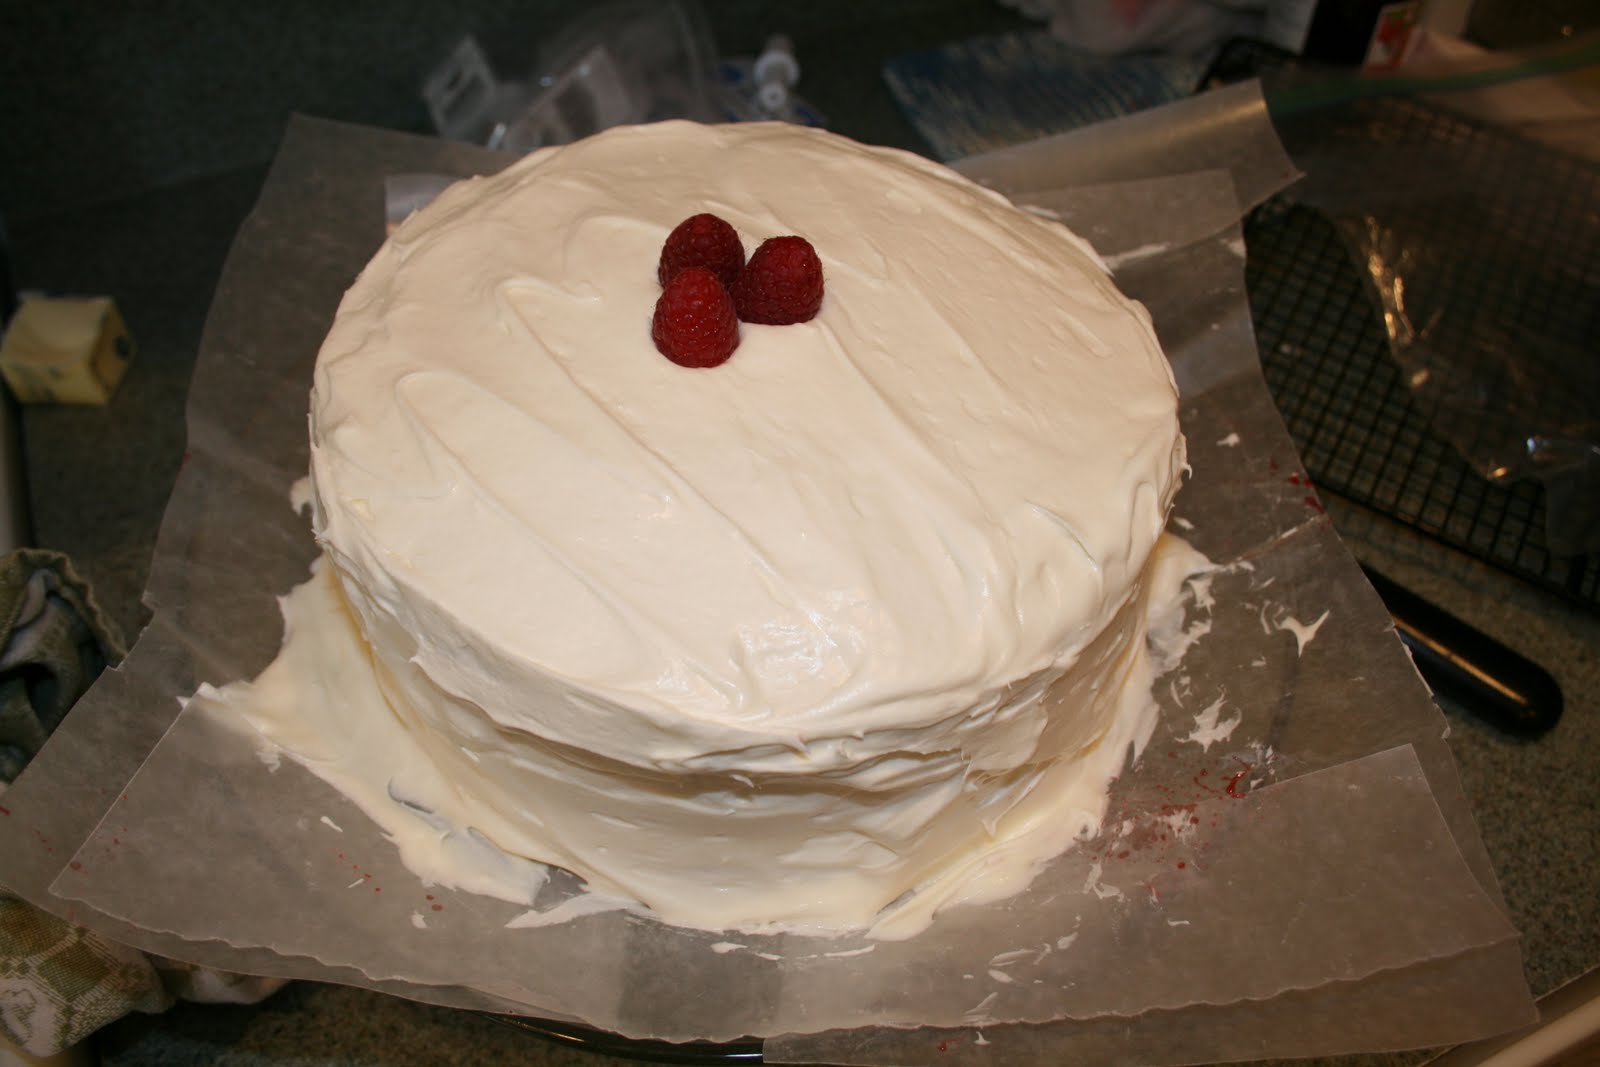
And now, for the verdict. This was an awesome cake! It met all the criteria for a checkerboard cake. It was beautiful on the outside and had perfect layers on the inside. It was moist and each taste was distinct, yet they went together perfectly. Enjoy!
(Side Note: I followed the recipe exactly, minus the red food coloring. I had a lot of leftover frosting so I think next time I might only make a half of a batch of frosting.)

(This thin slice was all that was left after our MOPS meeting!
I'm glad I had it so I could snap a picture of it, but it isn't the most appealing piece.)
Raspberry Checkerboard Cake with White Chocolate Frosting
Source: Chefs Catalog
Cake:
2 - 12 ounce packages of sweetened frozen raspberries
1 cup raspberry syrup, such as Torani
4 cups cake flour
3 teaspoons baking powder
1 teaspoon salt
1 cup unsalted butter, at room temperature
2 cups sugar
4 eggs
1 tablespoon pure vanilla extract
1 cup whole milk
Frosting:
1/2 cup seedless raspberry jam
1 cup unsalted butter, at room temperature
2 - 8 ounce packages cream cheese, at room temperature
1/2 teaspoon almond extract
12 ounces white chocolate, melted and cooled to room temperature
1 cup powdered sugar
a few fresh raspberries for garnish
Tips: Spread the jam between layers very lightly to preserve the checkerboard effect. Adding about 5 drops of red gel food coloring to the raspberry syrup will deepen the red hue. (I didn't add any coloring.)
Preheat oven to 325 F.
Lightly coat the cake pans with cooking spray and dust with flour. Set aside.In a medium saucepan over moderate heat, combine frozen raspberries and raspberry syrup. Bring to a simmer, reduce heat to low and continue cooking until liquid reduces by two-thirds.
Remove from heat and strain, pressing on the raspberries to release all the juices. There should be approximately 1 cup. Dispose of the raspberry pulp or reserve for another use. Add the food coloring, if using.
If there is more than 1 cup of juice, put in a small saucepan over medium heat and reduce to 1 cup; cool to room temperature. If there is less than 1 cup, add enough water to equal 1 cup.
In a medium bowl, sift together cake flour, baking powder and salt; set aside.
In the bowl of a stand mixer fitted with the paddle attachment, cream the butter and sugar until light and fluffy. Add the eggs one at a time, beating well after each addition. Beat in the vanilla extract.
Divide the batter in half. To one half of the batter, beat in the 2 cups of the flour mixture alternately with the milk to the batter, beating after each addition until smooth. To the remaining batter, beat in the remaining flour mixture alternately with the raspberry syrup to the batter until smooth.
Place checkerboard divider into one prepared pan. Then spoon in the two batters (red and plain) as described in "How to use your Checkerboard Cake Set."
Place all 3 pans in oven at same time. Rotate pans halfway through baking. Bake approximately 20 to 25 minutes, or until a toothpick inserted in the center comes out clean. Let the cakes rest in the pans, set on a rack, for 10 minutes. Place a cooling rack on top of each cake, invert the cake and remove the pan. Cool completely.
Using no more than 1/4 cup of jam, frost a very thin layer on top of one of the white cakes and on the raspberry cake.
In the bowl of a stand mixer fitted with the paddle attachment, cream the butter and cream cheese on high speed until light and fluffy, approximately 5 minutes. Beat in the almond extract. Reduce the speed to low and carefully drizzle the chocolate into the cream cheese. Increase the speed to high and beat until light and fluffy, about 2 minutes. Add powdered sugar and beat until well incorporated.
Spread a thin layer of frosting on the jam-covered white cake. Place the raspberry cake on top of this cake and spread a thin layer of frosting on top. Place the last white cake on top. Frost the sides and top of the checkerboard cake. Refrigerate until ready to serve.
1 comments:
I am so impressed! That looks fantastic. Your MOPS group is so lucky!
Post a Comment