Showing posts with label cake. Show all posts
Monday, July 9, 2012
Vanilla Cake with Vanilla Buttercream Frosting
Spontaneity at its best! The other day our son decided that he wanted to surprise Dad with a cake. Of course, he is too young to bake a cake by himself so he had to get me in cahoots with his surprise. It wasn't too difficult to say yes to such a cute little face and a heartfelt request. I can't tell yet if our son's love language is affirmation, physical touch, or giving gifts, but this is one example of how he likes to do things for others.
He made the request on Friday evening and it worked out perfectly because Dad had his volunteer shift for the police department the next day which meant that we could make his cake and present it to him at his mid-shift break without him even knowing about it. After Dad headed out for his first shift we figured out what type of cake to make. Our son wanted a road, police car, and the phrase "Good Job, Dad". He didn't know he needed to pick the flavor of the cake first. I gave him a choice from traditional flavors, chocolate, yellow, white. He decided that he thought Dad would like a white cake which was a bit disappointing for me because I am not a big fan of white cake. I quickly perused the internet and found a post that listed 50 of the best cupcake flavors. I started reading those and realized that I could make a white cake that was actually vanilla flavored; now that I could do.
The post that I mentioned that had the 50 different cupcake recipes linked to a Martha Stewart recipe which was showcasing a cupcake recipe from Billy Reece of Billy's Bakery in New York City. The recipe made 30 cupcakes but I figured that if I halved it I could bake a 9 inch square cake.
It was very easy to bake. In fact I whipped it up while our son was taking his nap. Immediately upon coming out of his room he told me that he decided he wanted "Crime" to be on the cake. I managed to convince him to keep the "Good Job, Dad" part on there and we could add a little part about "Helping Fight Crime". He was agreeable to this suggestion.
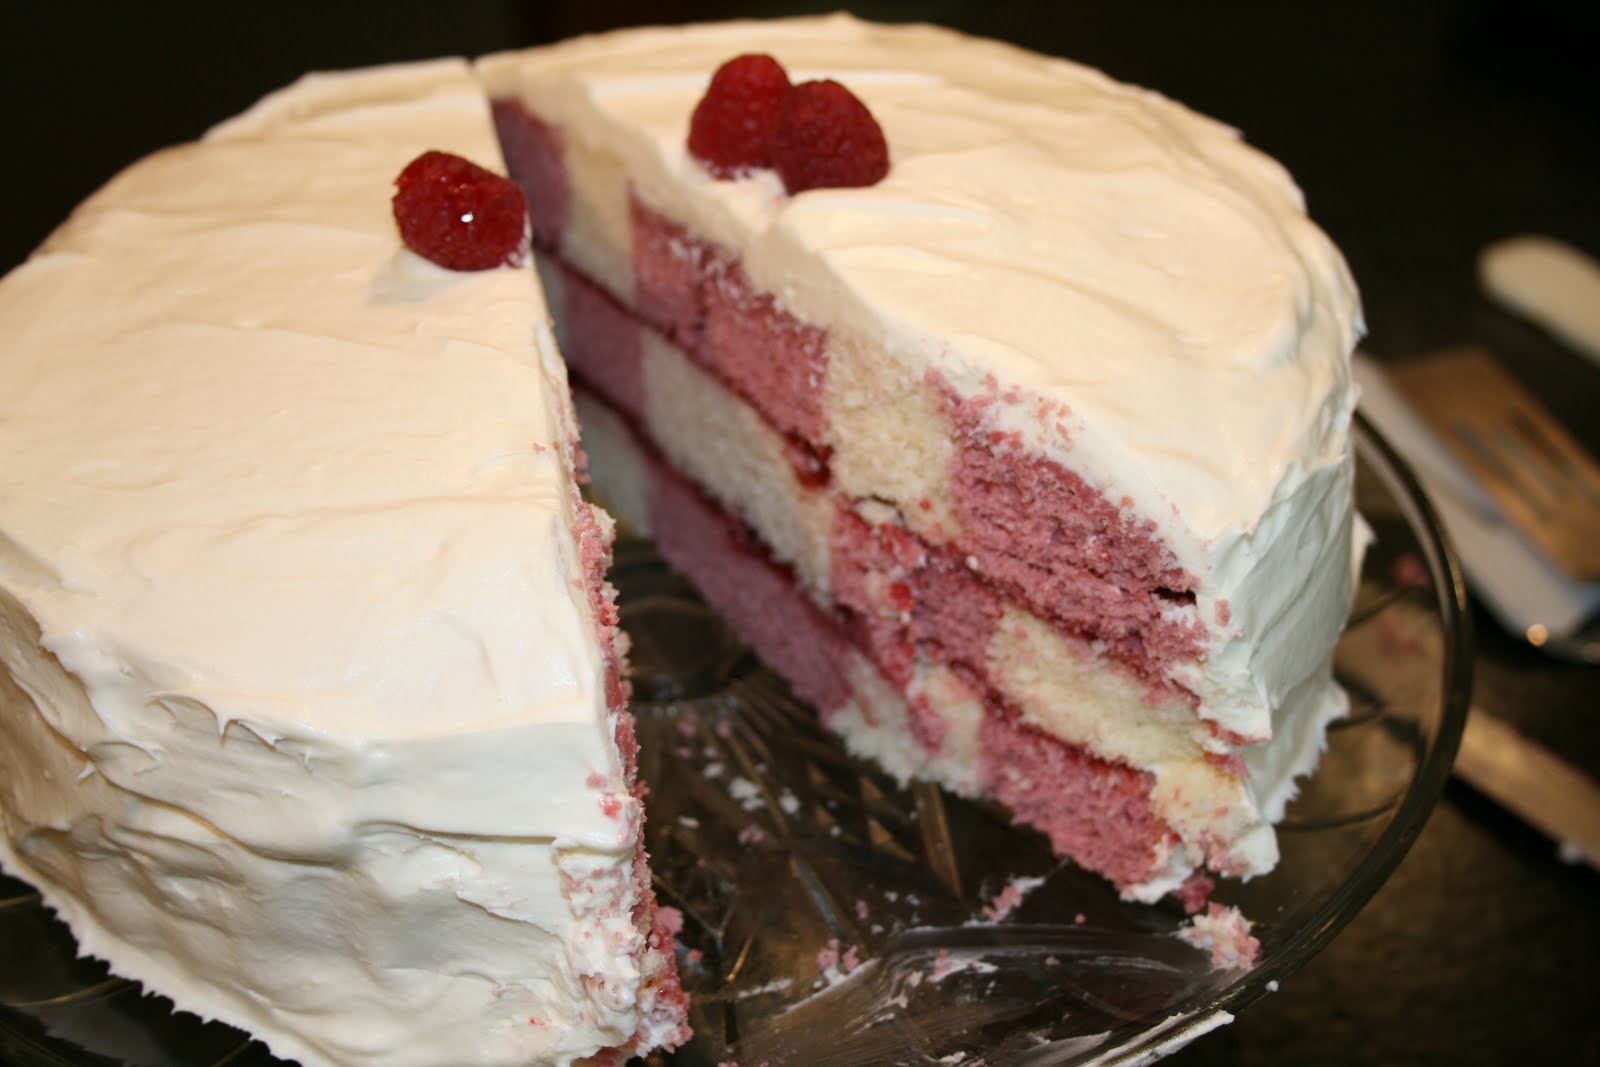
When it came to surprising Dad I was so afraid that he was going to drop the cake on the ground. Dad pulled up and wanted to come in the front door but I told him he needed to come around to the back. He thought that our son made some car/toy creation that he wanted to surprise him with. Instead he was surprised to see our son standing there holding the cake tray! Enjoy!
Vanilla Cake with Vanilla Buttercream Frosting
Source: Martha Stewart
1 3/4 cups cake flour, not self-rising
1 1/4 cups unbleached all-purpose flour
2 cups sugar
1 tablespoon baking powder
3/4 teaspoon salt
1 cup unsalted butter, cut into 1-inch cubes
4 large eggs
1 cup whole milk
1 teaspoon pure vanilla extract
Preheat oven to 325 degrees. Prepare pan; set aside. In the bowl of an electric mixer fitted with the paddle attachment, combine flours, sugar, baking powder, and salt; mix on low speed until combined. Add butter, mixing until just coated with flour.
In a large glass measuring cup, whisk together eggs, milk, and vanilla. With mixer on medium speed, add wet ingredients in 3 parts, scraping down sides of bowl before each addition; beat until ingredients are incorporated but do not overbeat.
Pour batter into pan. Bake, rotating pan halfway through, until a cake tester inserted in the center comes out clean, 25 to 30 minutes (17 to 20 minutes for cupcakes, longer than 30 minutes for 9x13).
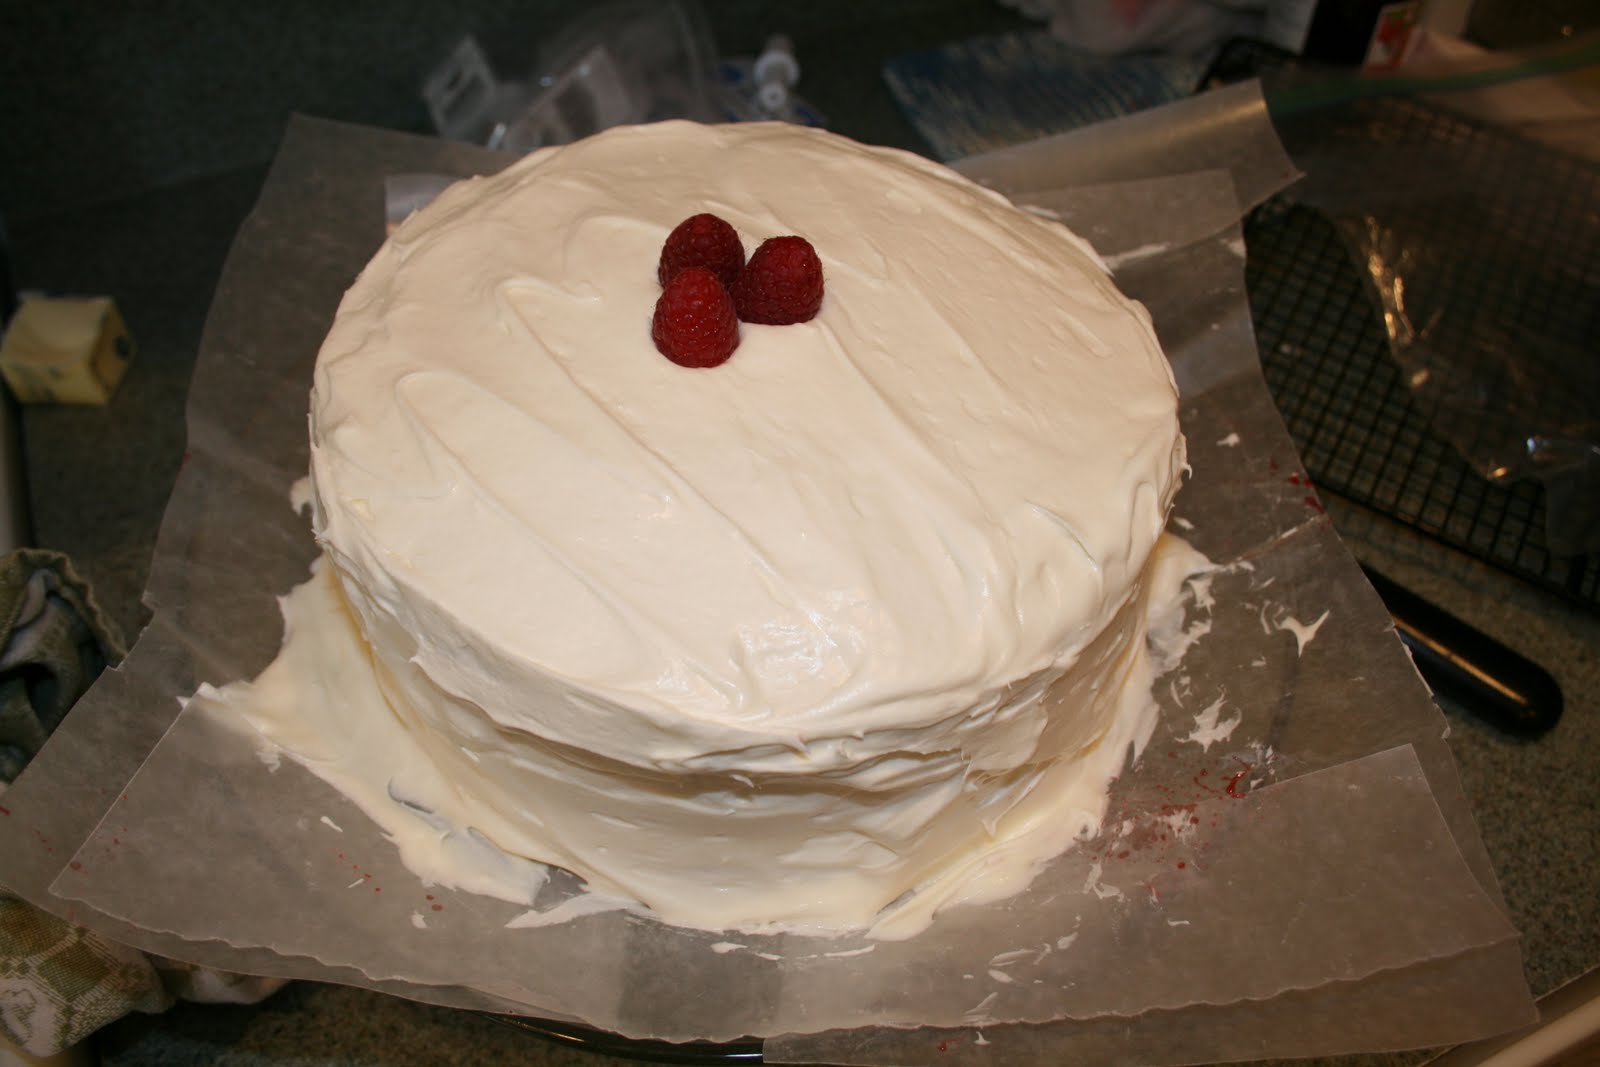
Transfer to a wire rack to cool completely. Once cake has cooled, use a small offset spatula to frost cake. Decorate, if desired. Serve at room temperature.
Vanilla Buttercream Frosting
1 cup unsalted butter, room temperature
6 to 8 cups confectioners sugar
1/2 cup milk
1 teaspoon pure vanilla extract
In the bowl of an electric mixer fitted with the paddle attachment, cream butter until smooth and creamy, 2 to 3 minutes. With mixer on low speed, add 6 cups sugar, milk, and vanilla; mix until light and fluffy. If necessary, gradually add remaining 2 cups sugar to reach desired consistency.
Makes about 30 cupcakes or a 9x13 cake
Labels:
cake
Saturday, June 30, 2012
Strawberry Checkerboard Cake
I had another opportunity to try out a new recipe and serve it to unsuspecting people! Another baby shower, yes we've had a lot of babies born to our staff this year, and this time it was for a girl. The mom-to-be requested either a chocolate or strawberry cake. I really wanted to do something fun so I decided to make a checkerboard cake again. The only problem was that I knew the raspberry checkerboard turned out really well but I wasn't sure if changing up the fruit would make a difference in the cake. I remember researching checkerboard cakes before and there being mixed reviews about moist versus dry and everything in between. I was a bit nervous to monkey around with the ingredients but I decided to give it a go.
I followed the raspberry checkerboard recipe, just switching out strawberries for raspberries. The cake came together similarly, although the white cake spread a bit more than the strawberry so my checkerboard didn't turn out exactly like a checkerboard this time.
Personally I didn't like this strawberry cake as much as the raspberry cake. Everyone at the shower raved about it, but remember, they were unsuspecting having never had the raspberry version before. Both my husband and I who have had both like the raspberry better. There just seemed to be a bit more of a distinct flavor between the two with the raspberry checkerboard. Still, this one was pretty good too. Enjoy!
Strawberry Checkerboard Cake with White Chocolate Frosting
Cake:24 ounces frozen strawberries
1 cup strawberry syrup, such as Torani
4 cups cake flour
3 teaspoons baking powder
1 teaspoon salt
1 cup unsalted butter, at room temperature
2 cups sugar
4 eggs
1 tablespoon pure vanilla extract
1 cup whole milk
Frosting:
1/2 cup seedless strawberry jam
1 cup unsalted butter, at room temperature
2 - 8 ounce packages cream cheese, at room temperature
1/2 teaspoon almond extract
12 ounces white chocolate, melted and cooled to room temperature
1 cup powdered sugar
a few fresh strawberries for garnish
Tips: Spread the jam between layers very lightly to preserve the checkerboard effect.
Preheat oven to 325 F.
Lightly coat the cake pans with cooking spray and dust with flour. Set aside. In a medium saucepan over moderate heat, combine frozen strawberries and strawberry syrup. Bring to a simmer, reduce heat to low and continue cooking until liquid reduces by two-thirds.
Remove from heat and strain, pressing on the strawberries to release all the juices. There should be approximately 1 cup. Dispose of the strawberry pulp or reserve for another use. Add the food coloring, if using.
If there is more than 1 cup of juice, put in a small saucepan over medium heat and reduce to 1 cup; cool to room temperature. If there is less than 1 cup, add enough water to equal 1 cup.
In a medium bowl, sift together cake flour, baking powder and salt; set aside.
In the bowl of a stand mixer fitted with the paddle attachment, cream the butter and sugar until light and fluffy. Add the eggs one at a time, beating well after each addition. Beat in the vanilla extract.
Divide the batter in half. To one half of the batter, beat in the 2 cups of the flour mixture alternately with the milk to the batter, beating after each addition until smooth. To the remaining batter, beat in the remaining flour mixture alternately with the strawberry syrup to the batter until smooth.
Place checkerboard divider into one prepared pan. Then spoon in the two batters (red and plain) as described in "How to use your Checkerboard Cake Set."
Place all 3 pans in oven at same time. Rotate pans halfway through baking. Bake approximately 20 to 25 minutes, or until a toothpick inserted in the center comes out clean. Let the cakes rest in the pans, set on a rack, for 10 minutes. Place a cooling rack on top of each cake, invert the cake and remove the pan. Cool completely.
Using no more than 1/4 cup of jam, frost a very thin layer on top of one of the white cakes and on the strawberry cake.
In the bowl of a stand mixer fitted with the paddle attachment, cream the butter and cream cheese on high speed until light and fluffy, approximately 5 minutes. Beat in the almond extract. Reduce the speed to low and carefully drizzle the chocolate into the cream cheese. Increase the speed to high and beat until light and fluffy, about 2 minutes. Add powdered sugar and beat until well incorporated.
Spread a thin layer of frosting on the jam-covered white cake. Place the strawberry cake on top of this cake and spread a thin layer of frosting on top. Place the last white cake on top. Frost the sides and top of the checkerboard cake. Refrigerate until ready to serve.
Labels:
cake
Thursday, May 3, 2012
Mississippi Mud Cake
While typing the title of this post I had to do my M-I-S-S--I-S-S--I-P-P-I spelling chant to make sure that I spelled it right. How funny that not only do I remember these little mnemonics as an adult, but I still use them!
We had a potluck at work last week. I believe we were celebrating our lovely secretaries. When the sign up came around it didn't take a lot of time for me to decide to sign up for a dessert. In case you haven't noticed from my posts, we haven't been eating a lot of sweets around here and I love baking a fun dessert. Who doesn't? Any chance I get to bake something and bring it for others to share I consider a win-win situation.
I just happened to decide on a Mississippi Mud Cake after seeing it on the site that is listed as my source. It was a last minute decision, as in the night before the potluck, finally deciding what to make. I was very surprised when I realized that I had every single ingredient in my house. This NEVER seems to happen with a new recipe. It never fails that there is at least one thing I have to run out and get. I thought this time it was going to be heavy whipping cream because I typically don't have that in my fridge. Imagine my surprise when on a whim I opened up my fridge to check just to make sure before I put it on a sticky and saw an almost full container sitting on the shelf. It was even before it's expiration date, how nice is that!
The only change I made is that instead of whole milk I used 1% milk. We don't drink whole milk around here and I figured that 1% wouldn't make that much of a difference. Oh, and I only had about 2 cups of mini marshmallows so I ended up cutting larger marshmallows into about 6 pieces each to make my last cup. You have to give me points for ingenuity.
I set out the ingredients before bed, got up early for my morning run, and then proceeded to bake this before work. Let me just say that it was super easy. I love making cake from scratch and this really couldn't have been an easier recipe to make. The only bad thing is that I kept slicing little pieces off because it was so darn good. Enjoy!
Mississippi Mud Cake
Source: Brown Eyed Baker
For the Cake:
1 1/2 cups all-purpose flour
1 1/2 cups granulated sugar
3/4 cup unsweetened cocoa powder
1 1/2 teaspoons baking powder
1 teaspoon salt
1 cup whole milk
8 tablespoons unsalted butter, melted
2 eggs
1 teaspoon vanilla extract
3 cups miniature marshmallows
For the Chocolate Glaze & Toppings:
1 cup pecan halves
1/2 cup semisweet chocolate chips
1/4 cup light corn syrup
1/4 cup heavy cream
1/2 cup shredded sweetened coconut
Preheat oven to 350 degrees F. Spray a 9×13-inch baking pan with nonstick cooking spray; set aside.
In a large bowl, whisk together the flour, sugar, cocoa powder, baking powder, and salt; set aside. In a medium bowl, whisk together the milk, butter, eggs, and vanilla extract. Add the milk mixture to the flour mixture and use a rubber spatula to gently fold it together until just combined. Pour the batter into the prepared cake pan. Bake for 30 to 40 minutes, or until a toothpick inserted into the center comes out clean and the cake is firm to the touch.
Remove the cake from the oven and evenly scatter the miniature marshmallows over top. Return to the oven for 5 minutes to melt the marshmallows. They will be puffy and lightly browned.
Reduce the oven temperature to 325 degrees F. Spread the pecans on baking sheet in a single layer and bake until fragrant, about 10 minutes. When cool enough to handle, coarsely chop the pecans.
Meanwhile, in a medium saucepan, combine the chocolate chips, corn syrup, and heavy cream. Stir over medium-low heat until the chocolate is melted and the glaze is smooth. Pour the chocolate mixture over the top of the cake. If necessary, use the back of a spoon to gently spread the chocolate over the marshmallow layer so it is evenly covered. Sprinkle with the pecans, and then the coconut. Let cool completely before serving. Store leftovers tightly wrapped (or in an airtight container) at room temperature.
Makes about 12 servings
Labels:
cake
Friday, April 27, 2012
Daring Bakers - Nazook and Nutmeg Cake
The Daring Bakers’ April 2012 challenge, hosted by Jason at Daily
Candor, were two Armenian standards: nazook and nutmeg cake. Nazook is a
layered yeasted dough pastry with a sweet filling, and nutmeg cake is a
fragrant, nutty coffee-style cake.
I don't make a lot of Armenian foods. I don't have an Armenian cookbook. I wouldn't even have known that these particular desserts were Armenian if I had not been told that in the description of this month's challenge. To me they seem like very simple, tasty, everyday recipes.
I decided to start out making the Nutmeg Cake. It seemed like it was the easier of the two and I figured if I could only get to one during the month, this would be the one that I would want to bake. It was very easy to make, smelled heavenly while baking, was delicious right out of the oven, and tasted equally yummy after being frozen for a few weeks and then reheated.
The only quirky thing was that while I was baking this cake we also had barbecued pork spareribs in the crockpot. For whatever reason I had this incredible sense of Thanksgiving. I think it was the pork/poultry cooking that reminded me of turkey, and the nutmeg cake baking that reminded me of spices and pumpkin pie. It was a bit funny to think about how smells really transport you to a certain time or place.
Skip ahead to a few weeks later when I decided to make the Nazook. I had never heard of Nazook before but it looked like a fairly simple pastry. I believe that if a Nazook is following the traditional flavoring it has a purely vanilla filling. I decided to make the traditional vanilla pastry with half of the dough, but also to branch out a bit with the other half. I'll get to that in a few minutes.
First, I made the pastry dough on a Saturday evening intending to whip up a batch on Sunday after letting the dough rest overnight in the fridge. Even though it is a yeast dough it doesn't puff up and double or triple in size like a bread dough. I didn't end up getting back to the dough until Monday evening, but it was still great to work with. I easily divided it into fourths, kneaded a fourth of the dough a bit to warm it up, and then rolled it out. The vanilla filling didn't crumble as much as it sounded like it was supposed to but it still went on fine. I rolled up my dough, cut it into 8 pieces and stuck them on my pan. I wasn't really sure how much I could expect them to rise so I decided to to another of the fourths with vanilla filling and just stick them on the same pan. That might have been a mistake.
Instead of turning into Nazook pieces they turned into Nazook pinwheels! You can see that a few of them turned out "kind of" right, but all the rest popped open and laid on their side. Since this was my first batch I had no idea what I had done wrong. I decided for my next batch though I would put more room between them and hope that they didn't "tip" over.
Well, it was either that hope or the fact that they were made with non-traditional dark chocolate and dried cherries that did the trick. Not sure, but these guys looked just about perfect to me! Enjoy!
I'll post the recipes at a later date. It is past my bedtime, and almost my posting time and I am hitting the hay.
Labels:
cake
Friday, March 9, 2012
Mini Milk Chocolate Bundt Cake
Every 5 months or so I get an opportunity to bake up a yummy dessert to serve to my book club compadres. Chocolate is always a good choice, especially during the winter, and you know how much I love cake. So . . . choosing a chocolate cake is a pretty sure bet.
I decided to try out another recipe from my cookbook, Baking From My Home to Yours. There are so many great recipes in there that I had a hard time choosing. I think the biggest factor in deciding to go with the Mini Milk Chocolate Bundt Cakes was that I didn't want any leftover cake. I knew that if I served a cake with some ice cream to each person they wouldn't be able to resist eating the cake in its entirety, therefore no leftovers. Perfect plan, perfectly executed!
The milk chocolate cake has a mild flavor, the nut swirl in the center gives the cake some crunch. The dark chocolate drizzle adds a bit more pizzazz, and the ice cream accompaniment brings it all together.
I'm not going to post the recipe because I didn't adapt it or modify it in any way and that would be copyright infringement, but I definitely think that purchasing Dorie's cookbook is a welcome addition to any baking kitchen. And if you are local you can always borrow mine to try it out. Enjoy!
Labels:
cake
Saturday, February 4, 2012
Better Than Sex Cake - Paula's Version
Remember about a month ago when I posted my chocolate version of this cake? Later that week we headed out for another holiday party and I decided to make another version. I mean, I couldn't just make one version of this cake, now could I? I really wanted to do a thorough job with my comparisons.
My second cake consisted of yellow cake, pineapple, whipping cream, and toasted coconut. Easy to make and pretty tasty too.
I hesitate to say this because I don't want to be disloyal or anything but this flavor combo was definitely better than the chocolate one. The problem with the chocolate is that the chocolate cake, pudding, and chunks were all the same chocolate flavor with varying textures, whereas this cake had a variety of flavors and textures that worked nicely together.
So, the verdict: I would definitely make this cake over the chocolate, but it still doesn't hold a candle to the real thing. Enjoy!
Better Than Sex Cake
Source: Food Network
1 box yellow cake mix, plus ingredients needed to prepare
1 (20 ounce) can of crushed pineapple
1 1/3 cups sugar
1 (3.4 ounce) box French vanilla pudding, plus ingredients to prepare
1 1/2 cups heavy cream
1 cup flaked sweetened coconut, toasted
Preheat oven to 350 degrees F. Grease a 9x13 pan.(Toast coconut for about 10 minutes in a 350 degree F oven.)
Prepare yellow cake, pour into pan; bake 30-35 minutes until edges pull away from pan.
While cake is baking, combine the pineapple and 1 cup of sugar in a saucepan. Bring to a boil over medium heat, stirring constantly. Remove from heat and allow to cool slightly.
Remove cake from oven and using a fork pierce holes into cake. Pour pineapple mixture over hot cake and set aside.
Prepare pudding according to package directions. Spread pudding over cake and refrigerate until thoroughly chilled.
Whip heavy cream and remaining sugar until stiff peaks form. Spread whipping cream over cake and sprinkle with toasted coconut.
Makes one 9x13 cake
Labels:
cake
Saturday, January 14, 2012
Chocolate Almond Upside Down Cake
Christmas Eve dessert! I have had this cake bookmarked in my recipes for a few years now so when I was searching for our Christmas dinner dessert I gave my son the choice between this and a chocolate-praline torte that I made many years ago before he ever joined our family. At first he chose the torte, but then he quickly switched over to this and wouldn't be swayed. The two recipes were very similar, one was more of a two layer cake with whipping cream in between the layers (I bet you can tell that was the other one). I was surprised by his choice because I thought he would go for the whipping cream layers, but I think he was drawn to the almonds. Granted, both cakes have almonds but he couldn't see them in the other cake under the layers of white.
What I love about this cake, and the other, is the taste and texture of the moist cake with the chewy praline topping and crunch of the almonds. It is the perfect combination of soft, chewy, and crunchy in one satisfying bite. I am definitely glad I made this and can finally get it off my bookmarked "to do" recipes. Enjoy!
Chocolate Almond Upside Down Cake
Source: Martha Stewart
Caramel Topping:
6 tablespoons unsalted butter, melted, plus more for pan
3/4 cup packed light brown sugar
1/4 cup honey
1 1/4 cups sliced or slivered almonds, lightly toasted
Cake:
1 1/4 cups cake flour (not self rising) 1/2 cup cocoa powder, preferably Dutch-processed
1 teaspoon baking soda
1/2 teaspoon salt
1/2 cup (1 stick) unsalted butter, softened
1 1/2 cups sugar
3 large eggs
1 cup buttermilk
1 teaspoon pure vanilla extract
Prepare the topping:
Generously butter a 10-inch round nonstick cake pan. Pour 6 tablespoons melted butter into the cake pan and swirl to coat the bottom; sprinkle in brown sugar. Drizzle honey over sugar and sprinkle evenly with almonds.
Preheat oven to 350 degrees F.
Prepare the cake:
Sift flour, cocoa powder, baking soda, and salt together three times to make the cake extra light. Place butter in the bowl of an electric mixer fitted with the whisk attachment and beat until smooth and fluffy. Add sugar and continue mixing. Add eggs, one at a time, beating after each addition. Continue beating until light and fluffy, about 3 minutes. With the mixer running on low speed, add a third of the dry ingredients and mix to combine. Add half the buttermilk and continue mixing. Add another third of the dry ingredients, mix, and add remaining buttermilk and vanilla. Add remaining dry ingredients and mix until smooth. Pour the batter into the pan.
Bake until set in the center and springy, 45 to 55 minutes. Run a knife around the edge of the pan and immediately invert the pan onto a serving platter. Let it sit with the pan still on top for 5 minutes so the caramel can soak into the cake a bit, before removing the pan. If the topping is sticking to the pan, warm the pan surface over a low burner to loosen the caramel and then pour it over the cake. Let cool completely. Cut into wedges with a serrated knife.
Labels:
cake
Sunday, January 1, 2012
Better Than Sex Cake - Chocolate Version
My husband looked at me sideways when I told him what I was going to make for our New Year's ring in dessert. I am a pretty conservative person so I think he thought it was pretty scandalous of me that I even thought about making a cake that had the letters s-e-x in the title. Okay, I'm not that bad, but I guarantee you he won't be telling anyone what the name of this cake is if we offer it to other people.
Baking a Better Than Sex Cake has been on my top 100 list since I formed my list soon after starting my blog. I think the name was more intriguing than the actual cake. I mean really, who came up with this title and why, I would really like to know.
While looking for the perfect recipe I actually came across quite a few. I mistakenly thought that this cake always used a chocolate base, but it turns out that it can be made with just about any flavor base. Next week I'll be taking a yellow cake version to our running club's after Christmas party and I'll let you know how it stacks up. (My husband told me I could take it as long as I didn't tell anyone what the name was.)
I typically like to bake cakes from scratch whenever possible, but for this one I stuck with a box cake mix. Too much work at this point in my holiday break to mess with finding the perfect cake recipe on top of finding the perfect recipe to put all the pieces together. You have to pick your battles and this wasn't one I wanted to fight on a New Year's Eve Saturday night. I have to say, for a box cake it sure was tasty.
And while I am not the type of girl to kiss and tell, I can tell you that the alternative is definitely better. It is just cake, after all. A yummy, gooey, crunchy cake, but still a cake. Enjoy!
Better Than Sex Cake - Chocolate Version
Source: Adapted from All Recipes
1 box Devil's Food cake mix + ingredients to make box mix
7 oz. sweetened condensed milk
6 oz. caramel sauce
1 fun size Heath bar per cake, crushed
whipping cream
Preheat oven to 350 degrees F. Grease cake pans. Bake cake according to directions on package.
Cool cake on a wire rack for 5 minutes. Poke various holes in cake with fork. While cake is cooling, heat condensed milk and caramel over low heat; stir until combined. Pour over cake and generously sprinkle with crushed candy bar.
After cake is completely cooled, garnish with a dollop of whipped cream, a drizzle of caramel, and a few pieces of crushed candy bar.
Makes 8 - 10 oz. cakes
Labels:
cake
Saturday, December 3, 2011
UPS Delivers Birthday Cake
Wow, it's been just over a week since my last post! I don't think I've had that much time between recipes for quite a while. It never fails that this time of year is busy for us, and especially so for the past 5 years. Our little guy celebrated his 5th birthday this weekend and it seems to be a whirlwind of activity from one celebration to the next.
While I didn't do anything fancy with his cake I thought I would post it anyway just in case there are any others out there who want to venture into theme cakes while their kids are still young enough. I don't know how many more years I'll be able to pull these off, but I'll take it while I can get it!
His request for his cake this year started out a bit like last year with wanting roads and such. When he mentioned trailers again I decided I would surprise him with something similar yet different. He and his dad had been looking for a brown UPS truck pulling a trailer. While I couldn't find a brown truck pulling a trailer I was able to find a brown truck and a semi truck and trailer.
I borrowed a commercial size cookie sheet from a friend (13x18, I believe) and whipped up a box of devil's food cake mix. I used store bought vanilla frosting and just tinted it brown and green. Crushed up chocolate animal crackers made up the road and assorted candy from a bridge mix made up the rocks. I was able to find silver taper candles that worked perfect for the streetlights.
My plan was to make boxes and a UPS drop box out of rice krispy treats and then cover them in marshmallow fondant. I used cocoa krispies just in case the fondant didn't turn out (at least they would have been brown) and then made up my very first batch of fondant. I have never worked with fondant before, and probably won't use it a lot. I would have to say that this was actually edible, unlike those that you buy from the store pre-made. How could it not be; the ingredients are marshmallows, powdered sugar, and water. Sweet, sweet, sweet!
I tinted it brown, rolled it out, cut it to fit my little rice krispy boxes and molded it to shape. They turned out pretty good and I was very happy with them. Tasty too! The drop box was another matter though. No matter how I cut and molded it just didn't look right. In the end, I left it out. Designers prerogative, I guess.
In the end, one 5 year old was very pleased and that's all that matters in the end! Enjoy!
Marshmallow Fondant
Labels:
cake
Tuesday, November 8, 2011
Dirt Checkerboard Cake
Cake! I love cake! Especially yellow cake with chocolate frosting! Is that enough exclamation points for you? This wasn't actually a yellow cake but it had plenty of chocolate frosting to fit the bill!
I wanted to make a checkerboard cake for our staff for Halloween. I knew I wanted to make a brown and orange cake (I just can't bring myself to do black food coloring for some reason, at least not in large quantities). The last time I made a checkerboard cake it was from scratch and it took a bit of time which I didn't feel like I had this time around. I decided to read all I could about making a checkerboard cake from box mixes.
Here are a few tips and tricks I found out while doing my research: Use two boxes of mix which will give you leftover batter but it's better to have more than less; when you use two types of cake mix (ie. chocolate and white) they will be different densities so pick one set of directions and use the same amount of water, oil, and eggs for both mixes; I read you can add 1/4 cup of flour to both mixes to make the batter more dense but I didn't do this. And as I posted in my raspberry checkerboard cake, always use a well greased pan insert and clean completely in between filling pans. Also, pull insert straight up and out so there is no bleeding between layers.
I was pretty happy with the way it turned out. One of the cake layers did beautifully, the second had a bit of trouble with sticking to the pan, and the final one had a lot of trouble with sticking and the rings started to separate. The thick chocolate frosting did help with getting the layers and rings together but I think in the future I will just plan to make the batter from scratch and divide it in half. I guess practice makes perfect so I'm just going to have to resign myself to making more checkerboard cakes so I can get better. It's a sacrifice, but I think I will be able to manage it.
Oh, and by the way, the photo above of the individual slice was taken at work after slicing the cake. It's not the best photo I could have taken, but it's not too bad considering that it is a point and click camera, it's a very thin slice because I didn't want too big of a piece of cake for myself, and I felt a bit self-conscious about cutting into the cake so that I could snap a picture. Not many people at work know that I have a food blog and I think people might think it is a bit weird to take pictures of food. Maybe not, but still, a bit self-conscious. Then you have the fact that my students were going to be walking in the door any minute and I wasn't sure if a staff member would innocently open my door to ask me a question and wonder why I was hunched down snapping a picture of a piece of a cake on a plate sitting on a piece of white construction paper sitting on my classroom floor. Okay, enough of the explaining since I think this paragraph may be longer than my actual write-up. Do you think I may have some issues? Don't answer that. Enjoy!
Labels:
cake
Wednesday, May 18, 2011
Checkerboard Cake
The beauty of this cake is that it looks simple and unassuming, yet it is not until you slice into the layers that you get a peek into the incredible design that is awaiting you. I really had a hard time deciding on the particular recipe to use for my first checkerboard cake. So many of the recipes out there (even the one that came with my pan set) are for a chocolate and yellow checkerboard cake. While I am perfectly okay with chocolate and yellow cake together (it is one of my favorite flavor combos for cake and frosting) I wanted something a bit different and a bit more summery. This particular checkerboard cake was going to our end of the year MOPS bash and I wanted it to reflect the summer theme we had chosen.
What a challenge finding a recipe though and feeling confident with it. I read so many reviews of checkerboard cake recipes that had some touting it as the best thing on earth and then others saying it was beautiful but the driest cake they had ever eaten. Couldn't there be a happy medium? Couldn't there be a cake that tastes great, is moist, and looks beautiful? Sometimes you just don't know until it comes to show time.
I had my doubts that this cake was going to turn out right from the beginning. The very first step is to cook down the frozen raspberries and raspberry syrup into a thick-ish syrup. I always doubt myself when it comes to the thickness of syrup necessary for my recipes. That and I really have little patience for waiting for raspberries (or any fruit) to break down and thicken up over the stove top. I guess it would help it I didn't wait until late in the evening before starting the recipe. I had good intentions of doing this step well before I needed to mix and bake the cake but as usual I let time get away from me. So, back to the syrup. It took a while for the raspberries to break down. Once I had enough of waiting I ran the sauce through a sieve to separate out the sauce and the seeds. It was supposed to yield me one cup of syrup. The fact that I had two cups of syrup meant that I hadn't broken it down near enough. So back on the stove top it went. This time I boiled and boiled and boiled the syrup until it looked like it was close to 1 cup. Voila! It measured at exactly one cup. However, it was now after 10 o'clock at night and there was no way I wanted to mix a cake I had never made before that required some technical components and bake it before bed. Instead I set my alarm for EARLY in the morning to finish.
Early the next morning I set out to mixing up the batters. It was a surprisingly easy process. The basic batter was the same, it was then divided in half (which I used my scale to do). To one half I added milk and 2 cups of the flour, to the other half I added the raspberry syrup and the other 2 cups of flour. I could tell that the batters were very different as far as texture was concerned. When I got them in the pan they were insanely different. This was the second time that I thought this cake was doomed. You can see the variations in texture between the pink and white circles even after the cake was done baking.
Since I was short on time I stuck them in the freezer to cool completely. After they were cool I added a thin layer of raspberry jam to one of the pink layers and then the white layer. I decided not to shave the tops to even the layers so I ended up stacking the bottom two layers top to top. Meanwhile I whipped up the white chocolate frosting. This was the third time that I thought this cake was doomed. It seemed as though the frosting was going to be way too thin but it ended up holding its form nicely.
And now, for the verdict. This was an awesome cake! It met all the criteria for a checkerboard cake. It was beautiful on the outside and had perfect layers on the inside. It was moist and each taste was distinct, yet they went together perfectly. Enjoy!
(Side Note: I followed the recipe exactly, minus the red food coloring. I had a lot of leftover frosting so I think next time I might only make a half of a batch of frosting.)
(This thin slice was all that was left after our MOPS meeting!
I'm glad I had it so I could snap a picture of it, but it isn't the most appealing piece.)
Raspberry Checkerboard Cake with White Chocolate Frosting
Source: Chefs Catalog
Cake:
2 - 12 ounce packages of sweetened frozen raspberries
1 cup raspberry syrup, such as Torani
4 cups cake flour
3 teaspoons baking powder
1 teaspoon salt
1 cup unsalted butter, at room temperature
2 cups sugar
4 eggs
1 tablespoon pure vanilla extract
1 cup whole milk
Frosting:
1/2 cup seedless raspberry jam
1 cup unsalted butter, at room temperature
2 - 8 ounce packages cream cheese, at room temperature
1/2 teaspoon almond extract
12 ounces white chocolate, melted and cooled to room temperature
1 cup powdered sugar
a few fresh raspberries for garnish
Tips: Spread the jam between layers very lightly to preserve the checkerboard effect. Adding about 5 drops of red gel food coloring to the raspberry syrup will deepen the red hue. (I didn't add any coloring.)
Preheat oven to 325 F.
Lightly coat the cake pans with cooking spray and dust with flour. Set aside.In a medium saucepan over moderate heat, combine frozen raspberries and raspberry syrup. Bring to a simmer, reduce heat to low and continue cooking until liquid reduces by two-thirds.
Remove from heat and strain, pressing on the raspberries to release all the juices. There should be approximately 1 cup. Dispose of the raspberry pulp or reserve for another use. Add the food coloring, if using.
If there is more than 1 cup of juice, put in a small saucepan over medium heat and reduce to 1 cup; cool to room temperature. If there is less than 1 cup, add enough water to equal 1 cup.
In a medium bowl, sift together cake flour, baking powder and salt; set aside.
In the bowl of a stand mixer fitted with the paddle attachment, cream the butter and sugar until light and fluffy. Add the eggs one at a time, beating well after each addition. Beat in the vanilla extract.
Divide the batter in half. To one half of the batter, beat in the 2 cups of the flour mixture alternately with the milk to the batter, beating after each addition until smooth. To the remaining batter, beat in the remaining flour mixture alternately with the raspberry syrup to the batter until smooth.
Place checkerboard divider into one prepared pan. Then spoon in the two batters (red and plain) as described in "How to use your Checkerboard Cake Set."
Place all 3 pans in oven at same time. Rotate pans halfway through baking. Bake approximately 20 to 25 minutes, or until a toothpick inserted in the center comes out clean. Let the cakes rest in the pans, set on a rack, for 10 minutes. Place a cooling rack on top of each cake, invert the cake and remove the pan. Cool completely.
Using no more than 1/4 cup of jam, frost a very thin layer on top of one of the white cakes and on the raspberry cake.
In the bowl of a stand mixer fitted with the paddle attachment, cream the butter and cream cheese on high speed until light and fluffy, approximately 5 minutes. Beat in the almond extract. Reduce the speed to low and carefully drizzle the chocolate into the cream cheese. Increase the speed to high and beat until light and fluffy, about 2 minutes. Add powdered sugar and beat until well incorporated.
Spread a thin layer of frosting on the jam-covered white cake. Place the raspberry cake on top of this cake and spread a thin layer of frosting on top. Place the last white cake on top. Frost the sides and top of the checkerboard cake. Refrigerate until ready to serve.
Labels:
cake
Saturday, March 5, 2011
100th Post!! Hubby's Birthday!! Chocolate Cherry Coke Cake!!
Well, what do you know, 100 posts! While I know that I cook and bake a lot, sometimes more than 3 meals a day, I am somewhat surprised that I have tried and written about 100 new recipes in just 13 months. And while not all of the recipes were new, I am happy to have shared all 100 of them with you!
While looking at my recipes that I have completed but have yet to post, I realized that I would be coming up on my 100th post right around the same time as my husband's birthday. I knew that I wanted something that looked super yummy and I've had this cake recipe sitting in my saved bookmarks for a little while. I happened to weasel an agreeable answer out of him when I asked him if I could have free reign over his birthday dessert, even if it was chocolate which he is not the biggest fan of. Ahhhh, everything is lining up right in my world.
It was a fun cake to make, and it tastes just as good as it looks! Enjoy!
**Side Note: My recipe makes 4 mini bundt cakes. Double my recipe to bake a full size cake.**
Chocolate Cherry Coke Cake
Source: Adapted from Maison Cupcake
Cake:
100g plain flour
125g superfine sugar
1/4 tsp baking soda
1/8 teaspoon salt
1 medium egg
62.5ml buttermilk
1/2 tsp vanilla extract
62.5g unsalted butter, room temperature
1 tablespoon cocoa powder
87.5ml Cherry Coca-Cola
Icing:
15g unsalted butter
1 1/2 tablespoons Cherry Coca-Cola
1/2 tablespoon cocoa powder
100g powdered sugar, sifted
Decoration:
chocolate “writing” icing
pitted cherries
Preheat oven to 350 degrees. Prepare cake pans, baking tins, or molds by greasing with butter and then a light layer of flour.
In a large bowl, mix the flour, sugar, baking soda, and salt; set aside. In another bowl, beat the egg, buttermilk and vanilla extract.
In a heavy based saucepan over medium-low heat, melt the butter, cocoa powder and Cherry Coca-Cola. Pour the butter/cola mixture into the dry ingredients and stir with a wooden spoon. Add the egg/buttermilk mixture and beat well until blended.
Pour into prepared baking tins or molds. Place cake pans on a baking sheet and bake in the oven, 40 minutes for one large cake and 20-25 minutes if you are doing smaller ones. A toothpick inserted into the center should come out clean. Leave the cake in the pans to cool for 15 minutes, then turn out onto wire cooling rack. Cool completely.
While cakes are cooling, make the icing. In a heavy based saucepan over medium-low heat, melt the butter, Cherry Coca-Cola and cocoa powder until liquid. (Do not overheat as it burns easily.) Remove from heat and spoon in the powdered sugar a little at a time. Beat well until you have a runny glace style icing.
Spoon the icing over the cake (or cakes). If you are using mini cake molds, attempt to drizzle artfully down the sides and whilst also coating, but not entirely filling the center. Allow to set for a couple of minutes then zig zag your little tube of chocolate writing icing backwards and forwards from the centre to the outside of the cake going all the way around. Pour the pitted cherries over the cake (or in the center for a mini bundt cake style. Four cherries will be about right for a mini cake.)
Labels:
cake
Saturday, December 4, 2010
Little Camper's Birthday Cake
Our family's youngest member celebrated his birthday this past Friday! His request for a cake included a road, campground loop, and a camping trailer that looks like ours. I thought I did a pretty good job of getting all the requested items on and then some considering that it was only a 9x13 cake. Think what I could have done with a half sheet or full sheet!
This was also the first time that I made sugar cone trees, and I must say that the frosting has to be just the right temperature to pull those things off. Too cold and the frosting won't squeeze out, too warm and it's like soup dripping down the cone. By the way, the freezer works great for storing them so that little eyes can't see them and so that the needles don't drip off your trees. Enjoy!
Labels:
cake
Friday, October 22, 2010
Apple Spice Cake with Caramel Drizzle
For some reason, September and October seem to spurn in me a desire to bake some sort of bread or dessert with apples or pumpkins. This year proved no different, so I decided to combine the mood of the season with something off of my top 100 things to bake list. I was really just searching for a great spice cake recipe when I happened to come across this one with apples thrown in.
This really was a great spice cake! It was moist, it tasted like delicious cinnamon, it had chunks of apple, and it was even better the second day after baking. The caramel sauce I could take or leave. It was good, but it was very sticky when eating it with the cake and it immediately hardened if you drizzled it over ice cream or even onto a plate. I know the second photo of the entire cake looks a little dry and a little plain, but it was actually really moist and once you added the caramel drizzle and the ice cream or whipped cream, it was heavenly. Enjoy!
Apple Spice Cake with Caramel Drizzle
Source: Martha Stewart
3 cups all-purpose flour
1 tablespoon ground cinnamon
1 teaspoon baking soda
1 teaspoon salt
1 1/3 cups vegetable oil
2 cups sugar
3 large eggs
3 to 4 Granny Smith apples, cored and cut into 1/2-inch pieces (3 cups)
1 cup chopped assorted nuts, such as pecans and walnuts
1 teaspoon pure vanilla extract
Preheat oven to 350 degrees. Spray a 12-cup Bundt pan with cooking spray; set aside.
Working over a large sheet of parchment paper, sift together flour, cinnamon, baking soda, and salt; gather sifted ingredients into center of sheet; set aside
In the bowl of an electric mixer fitted with the paddle attachment, combine vegetable oil, sugar, and eggs; mix on high speed until lemon yellow. Fold reserved parchment in half lengthwise; with mixer on medium speed, gradually shake in dry ingredients until just incorporated. Add apples and nuts to batter; mix to combine. Add vanilla, mixing until incorporated.
Pour batter into prepared pan, and bake until a cake tester inserted in the center comes out clean, 75 to 90 minutes. Remove from oven, and cool slightly on a wire rack. Invert cake onto rack; turn cake right-side up to cool completely on rack, and serve drizzled with caramel sauce.
Caramel Sauce
1 cup light brown sugar
1/2 cup unsalted butter
1/4 cup evaporated milk
1 teaspoon pure vanilla extract
pinch of salt
Combine ingredients in a small saucepan over medium heat. Cook, stirring, until thickened to desired consistency.
Labels:
cake
Thursday, July 1, 2010
Buttery Almond and Coconut Cake
Delicious! This cake melts in your mouth. You can make it even more diabetic friendly by substituting the sugar with another form of sweetener. Enjoy!
Buttery Almond and Coconut Cake
Makes one 10-inch cake or two 5-inch cakes
180 grams almond flour
2/3 cup shredded coconut
1/4 teaspoon salt
1 cup sugar
4 eggs
1 1/2 teaspoons vanilla extract
1/4 teaspoon almond extract
200 grams unsalted butter, melted and cooled
3 tablespoons flaked/sliced almonds
Preheat oven to 350 degrees. Butter springform pan(s) and line with buttered baking paper. Dust the baking paper lightly with flour.
Put almond flour, coconut, salt, and sugar into a bowl and mix together with a whisk. Set aside.
In another bowl, beat the eggs, vanilla extract, and almond extract until combined. Mix in the cooled butter until combined. Stir the dry mixture into the wet mixture. Scrape into the pan(s), spread evenly, and scatter flaked almonds on top.
Bake for about 40 minutes or until the cake springs back slowly when pressed. Slide knife around edge to loosen from pan and cool on rack. Remove from pan to serve.
**Can store for a week in fridge or 3 weeks in the freezer. Bring to room temperature to serve.**
Labels:
cake
Tuesday, June 1, 2010
Rainbow Cake (Six Layer Version)
I had these grandious plans to make a six layer coconut cake from the Peninsula G.rill, but that plan fizzled quickly when I got back home from running my half marathon and realized I was too tired and my cupboards were to bare to have even a semblance of what was needed for this monster cake. Another recipe for another time, I guess. I then thought I'd make a coconut layer cake that wasn't quite such a monster but decided that I really needed to go with something that I knew and was familiar with. Hence, the six layer rainbow cake that you see pictured above. This was my first time actually making it as a true six layer cake. My other versions involved a single layer and cupcakes so this was a deviation from the past, and even though I knew I had made something somewhat similar before, the ladies to whom I fed it to had not seen it before.
I followed the recipe exactly. It was helpful to have the wax paper under the layers of finished cake until I was finished icing. If not, can you imagine how messy that glass cake stand would have been? That's the first time I've actually used that method to frost a cake so it was fun to try a new technique.
Whipping up the buttercream frosting was an interesting experience. I thought for sure that I had whipped it too much and it had curdled, but lo and behold I waited just a few more minutes until the sound of the mixer changed and when I looked it was absolutely perfect. Not the smoothest buttercream you've ever seen but it was definitely tasty! Enjoy!
Rainbow Cake
Source: Whisk Kid
Cake:
3 cups cake flour
4 teaspoons baking powder
1/2 teaspoon salt
2-1/3 cup sugar
1 cup unsalted butter, room temperature
5 egg whites, room temperature
2 teaspoons vanilla
1-1/2 cups milk, warmed about 30 seconds in microwave to bring to room temperature
food coloring (gels work the best)
Preheat oven to 350 degrees. Oil and line three 9" cake pans or however many you have. (I just reused the three I had.)
Sift together the flour, baking powder, and salt. Set aside.
Cream the sugar and butter. Add the egg whites one at a time; add the vanilla and mix until fully incorporated. Then, alternating between wet and dry, add the milk and flour mixture in two parts.
Divide the batter between 6 bowls. (Easiest way is to do it by weight.) Stir in a fair amount of the appropriate food color to each bowl. Pour into pans and smooth out so batter is even. Bake for about 15 minutes each.
Remove from oven; let rest in pan on cooling rack for 10 minutes. Then flip, cover, and put them in the fridge to cool quickly.
Lemon Swiss Meringue Buttercream
To fill and crumb coat
9 egg whites
1-3/4 cup sugar
2 cups unsalted butter, room temperature
2 teaspoons lemon extract
To frost:
5 egg whites
1 cup sugar
1 cup butter, cubed, room temperature
1 teaspoon lemon extract
Cook the egg whites and sugar in a small saucepan over medium heat, whisking constantly, until the sugar is completely dissolved. Pour into another bowl and whip on high speed until room temperature (about 10 minutes). Then, on a medium-low speed, add the butter one cube at a time, waiting until each piece is incorporated before adding the next. After all the butter has been added, turn the mixer back up to high speed and whip until it has come together (about 5 minutes). Add the extract, beat briefly. (If the buttercream seems soupy after all the butter has been added, refrigerate for 5 to 7 minutes and continue whipping until it becomes fluffy and workable.)
Assembling:
Start with whichever end of the rainbow you would like to. Lay first layer down on plate. (I divided my frosting for filling and crumb coating into six bowls because I wanted to make sure I had enough.) Cover with layer of frosting, top with next cake layer, repeat for all layers. You may want to chill the cake at this point so the frosting is more workable. Cover the top and sides of the cake with frosting.
Labels:
cake
Tuesday, April 27, 2010
Daring Bakers - Traditional British Pudding
The April 2010 Daring Bakers’ challenge was hosted by Esther of The Lilac Kitchen. She challenged everyone to make a traditional British pudding using, if possible, a very traditional British ingredient: suet.
The challenge this month was to make a traditional British pudding using suet as one of the ingredients. From the beginning I was nervous because I had never made, nor even seen a British pudding, and I had no idea what suet was. For those of you that are thinking the same thing here is a brief description of both.
Not being British it took me a bit to wrap my head around the fact that they use the word "pudding" to mean many different things. "Pudding" can be a black pudding and white pudding, a sort of meat and grain sausage. It is also used as a generic word for dessert. It also can be any dish cooked in a pudding bowl or pudding cloth, normally steamed or boiled but sometimes baked. And finally, as an endearment (for example, "How are you today my pudding?"). For this challenge the third meaning, a dish cooked in a pudding bowl or cloth, applies.
Now, on to suet. Suet is the hard but flaky fat found on the inside of a cow or sheep around the kidneys and that area of the body. Suet in its raw form crumbles easily into small chunks. It also melts at quite a low temperature, which has an effect on how it works in cooking. Suet can be rendered, which is basically melting it and then straining out any larger pieces, or it can be used in its raw form. So basically we would be making our own shortening.
For this challenge we were given the option of making a savory or a sweet pudding, and total control over the ingredients even to the point of substituting butter or margarine for suet. The method of cooking was the main component of this challenge and we were given the option to steam or boil the pudding. As I started pouring over recipes I realized that there were a lot of options. I also knew that I wanted to make a savory and a sweet. When I came across this video showing how to make Spotted Dick, a traditional British pudding, I knew I had to try it. It is basically a sweet spongecake with golden raisins shaped in the form of a log.
My second British pudding I decided to do a savory pudding with a suet crust. I poured over more recipes and there were a lot, let me repeat a lot, of recipes for steak and kidney pudding. While I know this probably would have been the most traditional I could have gone for I just could not bring myself to buy, cook, and eat kidney. So when I saw this video showing how to make a steak and mushroom pudding I opted for that instead. I did not render the suet, instead I just crumbled it onto the scale to make sure I had the correct amount. There was not much of a smell and it was basically white crumbs, but after crumbling it a bit I did start to get grossed out by the sound it made tearing off the little strips of connective tissue. I could tell it was similar to shortening even at that point when I went to wash my hands and it took hot water and soap to get the greasy feel washed away.
It was very easy to make and tasted delicious, almost like a meat filled pie, but I don't think I'll be making it again, at least not a savory pudding. The savory puddings with a suet crust have to be steamed for about 5 hours and I have learned that 5 hours of steaming is not good for my pocketbook nor my house. Why you ask? First off, my gas stove has got be cranked to about medium high to keep the water boiling which creates the steam, and having the burner on medium high for 5 hours straight uses way more gas than I would ever use to cook a meal. Secondly, I didn't realize that it would put so much condensation into the air that my 110 year old wood framed single pane windows would have water running down the glass and pooling up on the wood frames below. By the way, that process alone created quite the smell. The kitchen smelled great but you would walk out into the living room, dining room, and even our bedroom which is the farthest room away and wonder what the smell was. I realized after my second trip in that it was the wood on my windows releasing an unpleasant odor that only 110 years of being in existence could create. I could have used my slow cooker but there was no way that it would get water up to the boiling point and keep it boiling for the length of time needed to cook the pudding. So while my husband and I enjoyed the final product, we did not enjoy the cooking method as much.
My final pudding was decided on after I saw so many people post the yummiest looking photos of chocolate pudding. I had decided to steer away from chocolate since I do many other desserts with chocolate, but it called my name and since it was relatively easy to do I did it at the same time that the savory pudding was cooking. I'm sure having two steaming pots going, one for 5 hours and the other for about 1 hour, didn't help the dew point being reached in our house. I think that of the three this is the pudding that I would make again. Go figure, it was chocolate. It only took about 45 minutes to steam and it was like an individual serving of chocolate cake. A scoop of ice cream would have gone nicely but I only had a tall glass of cold milk to accompany it.
This post is already long as it is so I am just going to post the links where I got the recipes instead of actually typing out the entire recipe. Enjoy!
Recipe and Video for Spotted Dick
Recipe and Video for Steak and Mushroom Pudding
Recipe for Very Chocolate Pudding (I made only half of the recipe that is posted and it made two 8 oz. ramekin sized cakes)
Recipe and Video for Spotted Dick
Recipe and Video for Steak and Mushroom Pudding
Recipe for Very Chocolate Pudding (I made only half of the recipe that is posted and it made two 8 oz. ramekin sized cakes)
Labels:
cake,
daring bakers,
main dish
Subscribe to:
Posts (Atom)