CLICK HERE FOR FREE BLOGGER TEMPLATES, LINK BUTTONS AND MORE! »
Showing posts with label cupcakes. Show all posts

Thursday, May 26, 2011

White Chocolate Cupcakes with Strawberry Cream Cheese Frosting

 
Along with the raspberry checkerboard cake I made for our MOPS meeting, I also whipped up a batch of these beauties for the thank you luncheon for our MOPPETS helpers. Yes, I know, they really aren't beauties, at least not when you compare them to the ones I saw that sparked my desire to bake them. But you win some and you lose some, right?

What I loved about these cupcakes was that they don't use a box mix (not that I'm against box mixes, I just wanted something that said I put a little more effort into their thank you) but they are super simple to make. The white chocolate cupcakes went off without a hitch. The frosting. however, is another story.

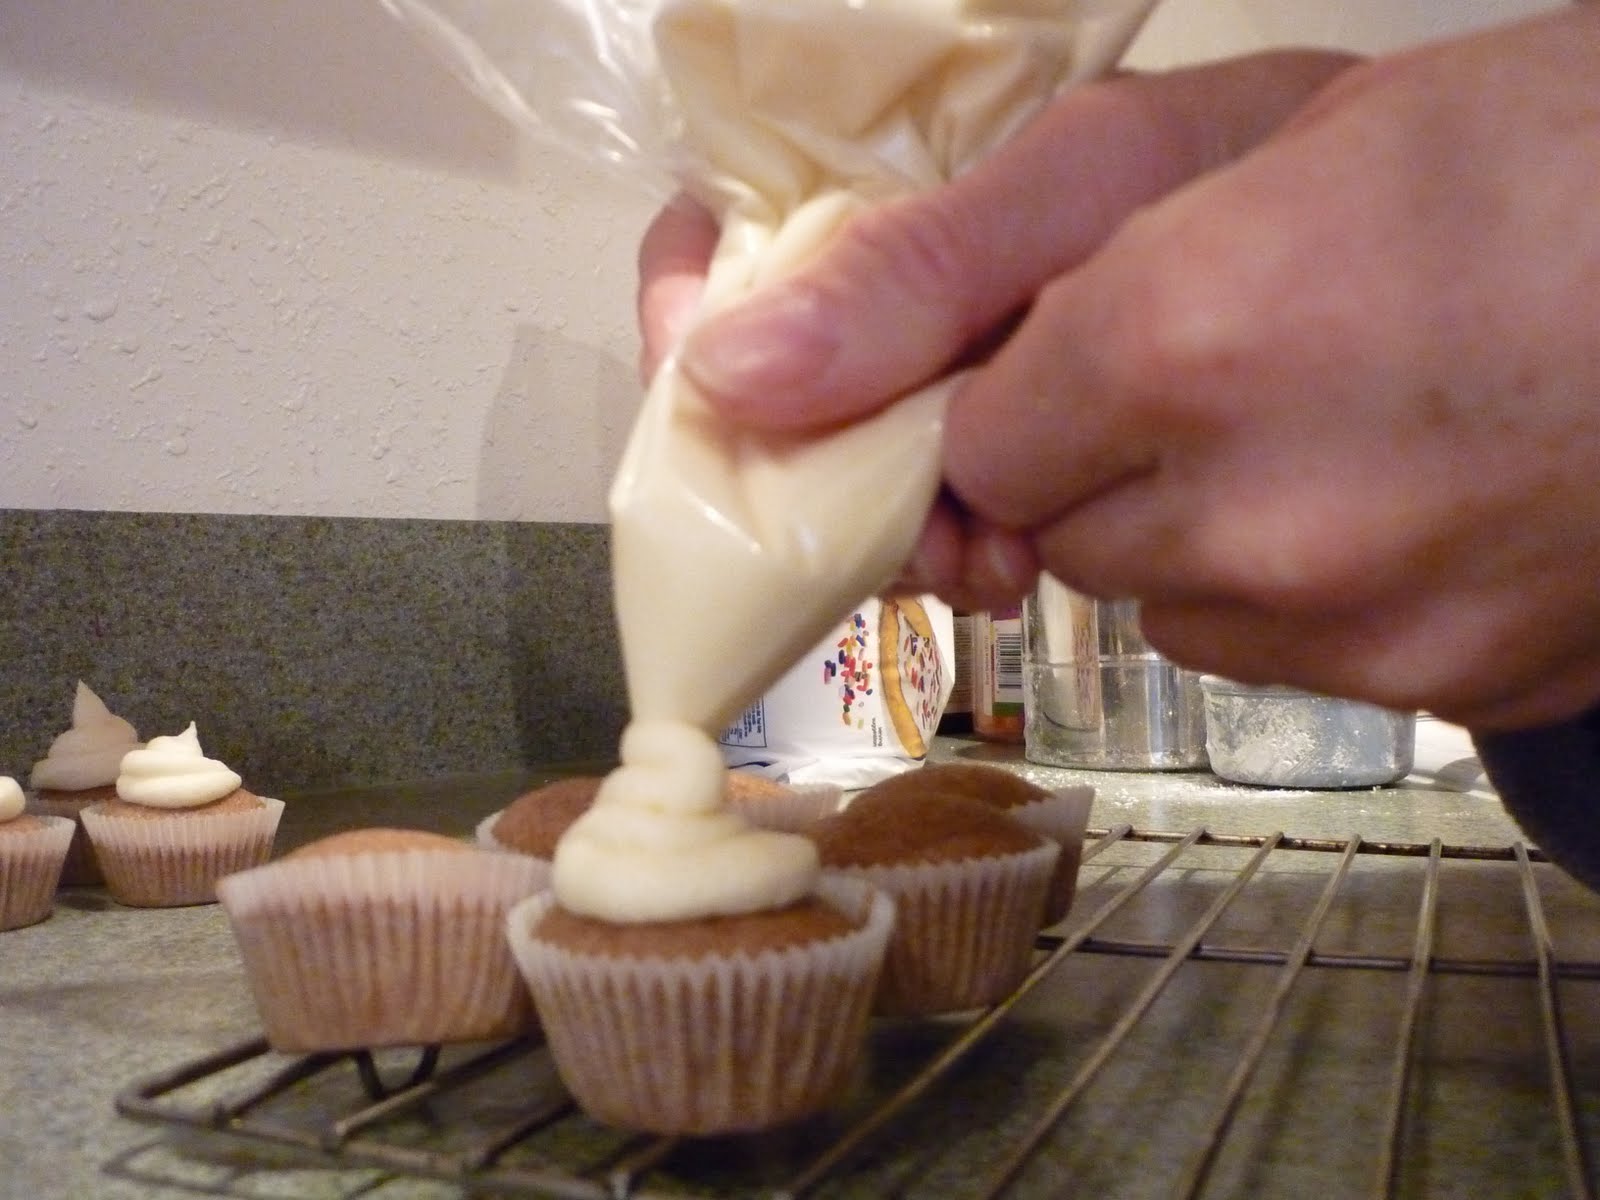
I made an entire batch of strawberry cream cheese frosting and an entire batch of white chocolate cream cheese frosting. You can see from the title of the post which one dominated the cupcakes and which one I will be making again. Don't get me wrong, the white chocolate frosting was heavenly but it couldn't stand up to the strawberry cream cheese. I even followed the suggestion of putting both frosting flavors in separate baggies and then putting both bags into a pastry bag so that they squeezed out simultaneously without mingling in the bag. Totally did not work for me. The strawberry, probably because it was a bit wetter and therefore not so dense, squeezed out easily while the white chocolate didn't make its appearance (no matter how much I squeezed) until the last few cupcakes.

Whichever frosting you chose, both will compliment the white chocolate cupcakes well. Enjoy!

Side Note: I had A LOT of leftover frosting. I was disappointed that I added 7 cups of powdered sugar and I still didn't have a stiff frosting that could stand up during piping. I would definitely only make half of a batch of frosting next time and not worry about the piping consistency so much.

White Chocolate Cupcakes with Strawberry Cream Cheese Frosting
Sources: Fake Ginger from Baking Bites

1 1/2 cups all purpose flour
1 teaspoon baking powder
1/2 teaspoon salt
1/3 cup butter, softened
3/4 cup sugar
2 large eggs
4 ounces white chocolate, chopped
1 teaspoon vanilla extract
1 cup plus 1 tablespoon milk

Preheat oven to 325 degrees F. Line muffin pans with cupcake liners.

In a medium bowl, whisk together flour, baking powder and salt. Set aside.

In a small, microwave-safe bowl, melt the chopped white chocolate by heating it in 30 second intervals in the microwave. Stir well with a fork between each interval and cook only until the chocolate is smooth when stirred.

In a large bowl, cream together butter and sugar until light. Beat in eggs one at a time, followed by melted white chocolate and vanilla extract. Working in two or three additions, alternate adding in some of the milk and some of the flour mixture, ending with a final addition of flour. Mix until just incorporated and no streaks of flour remain.

Divide batter evenly into prepared muffin cups. Bake for 20-23 minutes until a tester comes out clean and the tops spring back when lightly pressed with a fingertip. Cool completely before frosting.

Strawberry Cream Cheese Frosting
4 ounces cream cheese, softened
1/4 cup butter, softened
3/4 cup strawberries, food processed or blended
1/4 teaspoon vanilla
7 cups powdered sugar

Using a stand mixer, combine cream cheese and butter until fluffy. Add mashed strawberries and vanilla and mix until combined. Add powdered sugar 1 cup at a time until it reaches piping consistency.

Wednesday, December 22, 2010

Chocolate Candy Cane Cupcakes


For some reason these cupcakes were the thorn in my side! You can probably tell by the photo that I really couldn't get a great shot of these. That's because they were almost impossible to frost. I actually frosted these in two batches. The first batch frosted fairly well because the cupcakes had only been baked the night before and weren't overly moist. The frosting was a bit thick and gave me a bit of a hassle by pulling up the top layer of the cake so it then got mixed into the white frosting. And while it wasn't great for look, it didn't happen with all of the cupcakes.

Not so for the second half of the batch. Yikes! These had been in a covered container for about three days and while the cake was extremely moist, it was too moist. The frosting pulled the top layer of cake off so fast in was amazing. And frustrating. And I didn't even get to taste them because I am fasting from sugar. But those who did try them said they were very good.

If you do attempt to make these cupcakes I would suggest sticking them in the freezer for a bit before you frost them to give the top layer of cake a chance to harden up. I should have done this but didn't have time. Also, you can either make the cupcakes from scratch or you can do the abbreviated version from a box. Enjoy!

Chocolate Candy Cane Cupcakes
Makes about 18 cupcakes 

Cupcakes:
1 cup packed brown sugar
6 tablespoons butter, softened
2 large eggs
1 1/4 cups all-purpose flour
1/2 cup unsweetened cocoa
1 teaspoon baking powder
1/2 teaspoon baking soda
1/2 teaspoon salt
1/2 cup low-fat buttermilk
1 teaspoon vanilla extract

Peppermint Frosting:
2 cups powdered sugar
1/2 cup (4 ounces) cream cheese
1/8 teaspoon peppermint extract
16 hard peppermint candies, finely crushed (about 1/3 cup)
Preheat oven to 350°.

To prepare cupcakes, place brown sugar and butter in a large bowl; beat with a mixer at medium speed 2 minutes or until well blended. Add eggs, 1 at a time, beating well after each addition. Lightly spoon flour into dry measuring cups; level with a knife. Combine flour, cocoa, baking powder, baking soda, and salt in a bowl, stirring well with a whisk. Add flour mixture to sugar mixture alternately with buttermilk, beginning and ending with the flour mixture. Stir in vanilla extract.

Spoon batter into 18 muffin cups lined with paper liners. Bake at 350° for 12 minutes or until cupcakes spring back when touched lightly in the center. Cool in pan 10 minutes on a wire rack; remove from pan. Cool completely on wire rack.

To prepare frosting, combine powdered sugar, cream cheese, and peppermint extract in a bowl, stirring until smooth. Spread about 4 teaspoons frosting on each cupcake; sprinkle evenly with candies.

Thursday, December 9, 2010

Iron Cupcake Challenge - Black Forest Cupcakes


After taking the summer off I decided to give the Iron Cupcake Challenge one more go. The theme this month was Germany. I scoured various sites trying to find out what Germany is known for, besides beer and bratwurst, and I found quite a few different things. The one recipe that seemed to stand out to me though was Black Forest Cake. I love chocolate, I love cherries, and I love whipped cream! What could be better than the three of them combined and all wrapped up in a cute little package.

I found a recipe on a site that I have frequented before so I figured I couldn't go wrong with her recipe. Well, that might not have been true. It's not that the recipe was bad, it's just that it wasn't really great. For some reason the cupcakes just tasted kind of ho-hum to me, and that's even after I brushed some of the cherry liqueur on the top of the cupcake as well as using a dropper to drip it into the cherry filling. My biggest dilemma now is what to do with the other 374 mL of Kirschwasser Cherry Brandy. Hmmmm . . .


I did enjoy my first experience with using the cone method to fill a cupcake! It was especially fun to try it on a mini cupcake since there isn't much room for error. All in all the cupcakes went together smoothly, if not a bit time consuming, but the overall taste just wasn't what I was hoping for. Maybe next time. You might find you enjoy them more than I did!

Black Forest Cupcakes
Source: Annie's Eats

For the cake:
1 2/3 cups all-purpose flour
2/3 cup unsweetened cocoa powder, sifted
1½ tsp. baking soda
1 tsp. salt
1 tsp. espresso powder
8 tbsp. unsalted butter, at room temperature
1½ cups sugar
2 large eggs
1 tsp. vanilla extract
1½ cups buttermilk

For the filling:
1 lb. fresh cherries, washed, pitted and destemmed
2 tbsp. sugar
Maraschino cherry juice or cherry liqueur

For the frosting:
1¼ cups heavy cream
6-7 tbsp. sifted confectioners’ sugar
1 tsp. vanilla extract

For garnish:
Fresh (or maraschino) cherries, with stems
2 tbsp. sugar
Chocolate shavings

To make the cupcakes, preheat the oven to 350 degrees.  Line wells of cupcake pans with paper liners.

In a medium bowl, combine the flour, cocoa powder, baking soda, salt and espresso powder together; whisk to blend, and set aside. In the bowl of a stand mixer fitted with the paddle attachment, cream together the butter and sugar on medium-high speed until light and fluffy, about 3 minutes. Beat in the eggs one at a time until incorporated, scraping down the sides of the bowl as needed. Mix in the vanilla extract. With the mixer on low speed, mix in the dry ingredients in three additions alternately with the buttermilk, beginning and ending with the dry ingredients. Mix each addition just until incorporated.

Divide the batter evenly between the prepared cupcake liners, filling each about ¾ of the way full.  Bake 10-12 minutes for mini cupcakes or 18-20 minutes for full-size cupcakes, or until a toothpick inserted in the center comes out clean. Let cool in the pan for 5-10 minutes, then transfer to a wire rack to cool completely.

To make the filling, add the fresh pitted cherries to a bowl. Mash with a wooden spoon or potato masher until the cherries are no longer completely intact. Mix in the sugar and toss to coat the fruit.

To fill the cupcakes, use the cone method to remove a portion from the center of each cupcake. Spoon in about 2-3 cherries. Drizzle some maraschino cherry juice (or cherry liqueur) over the fruit.  (Additionally, this can be brushed over the edges of the cupcake to further deepen the cherry flavor.)

To make the whipped cream frosting, add the heavy cream to the bowl of a stand mixer fitted with the whisk attachment. Start beating on medium-low speed, slowly increasing as the cream begins to thicken up to medium-high speed. While the cream is being whipped, gradually add in the confectioners’ sugar a spoonful at a time. Whip the cream until stiff peaks form. (Be careful not to overbeat!)  Fold in the vanilla extract.

Frost the filled cupcakes with the whipped cream. Garnish as desired with a cherry and chocolate shavings. Refrigerate until ready to serve.

Wednesday, November 10, 2010

Dirt Cupcakes


For some reason I love making dirt cupcakes, especially in the Fall! Last year, at the end of October I made cupcakes that were decorated as spiders, pumpkins, and dirt. While the others were laborious and time consuming, the dirt cupcakes were easy and fun. I decided that this year I wasn't going to mess around with difficult decorations and instead just went straight to fun!

You can either use a box cake mix or make them from scratch. I have used both. This year, for the sake of time, I went with box mix. I made two batches, one yellow cake and the other chocolate. Yes, I used the frosting in a can because sometimes it's just easier. After frosting both sets of cupcakes, I set a gummy worm in the middle and then sprinkled crushed up chocolate animal crackers over the top. The animal crackers worked great. Last year was a disaster. I couldn't find plain chocolate cookies so I instead bought oreos. Unfortunately, when you crush oreos the filling still shows white and all the cookie crumbs stick together. I ended up scraping the filling out of the oreos and crushing just the cookies. Like I said, this year was much easier. Thank goodness for chocolate animal crackers! Enjoy!

Monday, May 10, 2010

Iron Cupcake Challenge - Horchata Cupcakes


The Iron Cupcake Challenge visited Mexico this month. My first thought upon hearing our destination was chocolate and chile but I wanted to find a flavor that was a bit more unique. After asking friends and searching for Mexican flavor combos I was left with these two cupcake flavors, margarita and horchata. Most people have heard of a margarita and they are aware that it typically involves lime, salt, sugar, and alcohol. However, I'm sure many people have not been introduced to horchata. It is a drink that typically includes rice, almonds, cinnamon, milk, and honey. I was a bit skeptical at first, never having tried one before. Imagine my surprise when I went to purchase one and learned that it was a cold drink. In my mind I had been imagining it as a hot drink, similar to a hot chocolate. After sampling horchata from a local taqueria and another from a taco truck I decided to go ahead with the horchata flavor. And let me say right now, I am so glad I did!


The cupcake has a cinnamon flavor, but there are subtle flavors of rice milk and almond mixed in. The cream cheese frosting is the perfect addition! These little guys just kept popping in my mouth; right out of the oven, cooled down that evening, the next morning, then with the frosting, later in the afternoon. Yikes! My husband was even talking about these the next day at work. I didn't make any changes to the recipe. I have included the recipe for homemade horchata but I used the one I bought from the taco truck. Enjoy!

Horchata Cupcakes
Source: The Pink Apron

2 1/2 cups all-purpose flour
1 1/2 cups sugar
1 teaspoon baking soda
1 teaspoon salt
1 1/2 level tablespoons cinnamon
1 1/3 cups safflower oil
1 cup fresh Horchata (see recipe below or purchase already prepared)
2 large eggs, room temperature
1 teaspoon white distilled vinegar
1 teaspoon vanilla extract

Preheat oven to 325 degrees. In a medium bowl, sift together the flour, sugar, baking soda, salt, and cinnamon. In a large bowl, gently beat together the oil, horchata, eggs, vinegar, and vanilla with a mixer. Add the dry ingredients to the wet and mix until smooth and thoroughly combined. Divide the batter evenly among the cupcake tins, filling about 2/3 full. Bake for about 12 minutes, rotating the pan about halfway through baking. Remove from oven and cool completely before frosting.

Cream Cheese Frosting
1 cup butter, room temperature
16 ounces cream cheese, room temperature
1 1/2 teaspoons vanilla extract
3 cups powdered sugar, sifted

Cream the butter and cream cheese on medium speed using an electric mixer. Add vanilla extract, mix in thoroughly. Gradually add the sifted powdered sugar and mix on low-med speed. Once all the powdered sugar is mixed in, put mixer on med-high speed and beat for a few minutes until light and fluffy. Pipe onto cooled cupcakes. Shake cinnamon over the top as a garnish.

Horchata
Makes 3 cups

1/3 cups (2.5 ounces) rice, medium or long grain rice will work
1/2 cup plus 2 tablespoons (3 ounces) blanched almonds
3 inch piece of cinnamon stick
1 1/4 cups hot tap water
1/2 cup turbinado (raw) sugar, plus more to taste
1 cup cold vanilla soymilk or almond milk

In a large bowl, combine the rice, almonds, cinnamon stick and water. Cool, cover and refrigerate overnight.
Pour the mixture into a blender or food processor, add the sugar and blend on high for several minutes, until the mixture is as smooth as possible – there will still be a hint of grittiness when you rub a drop between your fingers. Strain through a fine sieve, pressing on the solids until only a dryish pulp remains. Pour into a pitcher and add the milk. Taste and sweeten with more sugar to taste, if needed. Enjoy over ice.

Monday, April 12, 2010

Iron Cupcake Challenge - Tiramisu Cupcakes


Iron Cupcake Challenge round two, here I come! This month's challenge theme is Italy and tell me what is more Italian than tiramisu? I guess you could have answered pizza, pasta, or wine, but that would not have been the answer I am looking for. I did seriously think about (and even found) some savory "cupcakes" that were actually mini pizzas. But when I think of cupcakes I think of sweet so tiramisu inspired cupcakes won out over pizza cupcakes.

There are quite a few recipes for tiramisu cupcakes, everyone from Martha Stewart to the food network to Joe Schmoe has a recipe. I bookmarked about 4 or 5 different ones that sounded like they could work but I couldn't make up my mind at the time. After going about my business for a few weeks I realized that the challenge date was getting closer and I'd have to make a decision sometime soon. Hmm, I know, I'll make a batch of the two that sound the best and my husband can take them into work for his drill weekend as a taste test kind of thing. That will work.

Scratch that. After perusing the recipes I realized two things: one, there was really only one recipe that stood out to me this time as the one that I would like to bake, and two, this isn't a professional competition so why waste money on somewhat expensive ingredients just to make two batches of taste test cupcakes. Ahhh, I just may learn the art of saying no (especially to myself) and not putting too much on my plate one of these days.

So, back to the recipe.These were really fun to bake! Surprisingly, almost all my cupcakes turned out the same size so I must have done something right when squeezing the batter into the cupcake liners. Also, these were probably the most beautiful cupcakes I've ever made and that was even before the icing was piped on. The way the espresso glaze mottled the spongecake just baffled my mind. Gorgeous!


I slightly adapted the cupcake recipe and did end up completely changing the frosting recipe that I had planned to use. I started to make the one included with the cupcake recipe and realized right away that it wasn't quite what I was looking for in my tiramisu frosting. I ended up going with a fluffier version from Martha Stewart. Enjoy!


Tiramisu Cupcakes
Source: Epicurious.com and Martha Stewart

Cupcakes
2 cups cake flour
2 teaspoons baking powder
1/2 teaspoon salt
1 cup butter
1 1/2 cups white sugar
8 egg yolks
1 1/2 teaspoons vanilla extract
3/4 cup milk

Tiramisu Glaze (prepare when cupcakes have cooled) (I only used about half of mine)
1 cup hot espresso
1/3 cup sugar
1/4 cup Ghiradelli Dark Chocolate syrup (I used Torani Chocolate Syrup found in the coffee aisle)
2 ounces Kahlua
1/2 ounce Myers Dark Rum or Brandy

Icing
1 cup heavy cream
1/2 tablespoon pure vanilla extract
1 - 8 ounce package marscapone cheese, room temperature
1/2 cup confectioner's sugar, sifted
cocoa powder, chocolate covered espresso beans, and/or chocolate shavings for garnish


Cake Directions:
Preheat oven to 350 degrees. Line muffin pans with cupcakes liners (aluminum might work best). Sift together the flour, baking powder, and salt. Set aside.

In a large bowl, cream together the butter and sugar until light and fluffy. Beat in the egg yolks one at a time, then stir in the vanilla. Beat the flour mixture alternately with the milk, mixing just until incorporated. Pour batter into prepared pans.

Bake for 15-24 minutes, or until top springs back. (My mini's baked 10 minutes and the full size baked 13 minutes.) Let cool for thirty minutes, then remove from pan and cool an additional 30 minutes.

Glaze Directions:
Melt the sugar into the hot espresso in a large mixing bowl by mixing by hand with a whisk. Then add chocolate syrup, kahlua, and rum/brandy. See assembling directions.

Icing Directions:
With an electric mixer, whisk heavy cream until stiff peaks form (be careful not to overbeat or cream will be grainy). Add vanilla, and whisk until blended. In another bowl, whisk together marscapone cheese and confectioner's sugar until smooth. Gently fold whipped cream into marscapone mixture until completely incorporated. Put icing in a piping bag.

Assembling the cupcakes:
Take a toothpick or a fork and poke several small holes in the top of each cupcake. (I made about 7 holes with a toothipick.) Spoon about 1-2 teaspoons of espresso glaze over the top. (Place a bowl underneath to catch drippings so you can reuse the glaze.) Then dip the top of each cupcake into the glaze to ensure that it is evenly covered. It shouldn't be soggy, just covered enough that the cupcake looks light brown.

Pipe icing onto each cupcake. Lightly dust cupcakes with cocoa powder and top with espresso beans and/or chocolate shavings.

Saturday, April 3, 2010

Easter Egg Cupcakes


Anybody want to find these Easter eggs hidden around their house? These "eggs" were my first attempt at using an idea from my cookbook Hello Cupcake. I think they actually turned out pretty well for my first try at constructing a multi-step cupcake where the presentation pretty much makes or breaks the dessert.

The base is a chocolate cupcake (I believe I used a "dressed up" box mix), the grass is green tinted frosting, and the eggs are graham crackers that have been frosted and decorated. Creating the eggs is the most time consuming part of this dessert. Using a tracer, you cut each graham cracker into an egg shape by filing down the edges. Then you carefully frost the top and sides of the cracker (without getting your fingers onto it and smooshing the frosting) then sprinkle or dip it into decorating sugar. You attach the egg to the cupcake with a glob of green frosting, then you pipe the grass around the edges of the cupcake underneath the cracker. After it is attached you can decorate your Easter eggs however you like.

Be warned, when eating it is a bit difficult to get all the components in one bite, especially if you try to eat them right after you make them. If you wait a few hours, or better yet the next day, the graham crackers have softened enough that they don't break to bits immediately upon biting into them. Enjoy!

Saturday, March 13, 2010

Iron Cupcake Challenge - Chocolate Mint Chip Cupcakes with Swiss Mint Meringue Buttercream


Monday afternoon I was checking our local paper online for some information about a restaurant that we heard was possibly closing when I stumbled upon an article about a cupcake challenge that had been held at the restaurant this past summer. Who can resist a cupcake challenge? Not me, so I researched the contact person and sent off an email inquiring if their group was still holding challenges. Sure enough, I got an email back confirming that not only were they still hosting challenges but that the monthly challenge was that very evening. Well, as I said earlier, I cannot resist a challenge so I inquired further as to whether it would be too late for me to participate. After getting the green light from my husband and the affirmative that I could indeed still enter I frantically started searching for the perfect cupcake recipe for my entry. The theme, Ireland. What is more perfect for Ireland than green? What goes with green? Mint. What goes with mint? Chocolate! And that is how the search for Chocolate Mint Chip Cupcakes with Swiss Mint Meringue Buttercream was born.

I have to confess that I did not win the challenge. Sadly, I did not even come in the top three. However, my achievement was still sweet to me because I not only used a recipe that I had never made before, for both the cupcakes and frosting, but I had to wait to pick up a few necessary ingredients until after naptime and I still managed to whip up a double batch of cupcakes resulting in over 75 mini cupcakes and one regular sized while also preparing my display in just under 3 hours. Whew!

We won't tell anyone that I had to put my cupcakes in the freezer to cool them enough to frost them. We won't tell anyone that I was sitting in the backseat trying to pipe buttercream onto my little cupcakes and then sprinkle them with crushed mints while my husband was frantically trying to get us there on time. Finally, we won't tell anyone that my three year old son seems to have an aversion to sugar. He would rather have a tortilla than a fresh baked cupcake. I guess steering him away from sugar for his first few years is now reaping its benefits, but I digress.

For more information on the local Iron Cupcake challenge you can go here. Enjoy!


One trick I've learned for filling mini muffins and cupcakes is to fold the edges of a plastic bag (quart freezer works best because it is big enough and thick enough), set the bag in a small cup or bowl, and then pour or spoon the batter into the bag. You then seal it and snip a corner of the bag for whatever size hole you need for squirting the batter or frosting. It makes fairly evenly sized cakes and it is usually less messy. Also, this cupcake is a bit dense (you can see that in the picture) so make sure you don't overbake it. I didn't overbake and mine still were a little dry.


Chocolate Mint Chip Cupcakes
Source: Taste and Tell and How to Eat a Cupcake

1/4 cup unsalted butter, room temperature
3/4 cup granulated sugar
1/3 cup (2 ounces) unsweetened chocolate, coarsely chopped, melted
2 large eggs, room temperature
1 teaspoon peppermint extract
1/2 cup chocolate milk
1 1/2 cups all-purpose flour
1 teaspoon baking soda
1/2 (6 ounces) mini semi-sweet chocolate chips
chocolate garnish (jimmies, Andes baking mints, chocolate shavings)


Preheat oven to 350F. Insert liners into a medium cupcake pan.

In a large bowl, cream together the butter and sugar with an electric mixer on medium speed until light and fluffy, 3-5 minutes. Beat the melted chocolate into the butter mixture. Add the eggs, peppermint extract, and chocolate milk. Beat until creamy.

In a separate medium bowl, combine the flour and baking soda.

Add the dry ingredients to the chocolate mixture and beat until blended - do not over beat. With a rubber spatula, stir in the chocolate chips.

Fill the cupcake liners 2/3 - 3/4 full. Bake for 15-20 minutes (regular size cupcakes) or 10-12 minutes (mini cupcakes) or until a toothpick inserted in the center comes out clean. Cool cupcakes in pan. Frost with desired frosting. Sprinkle with chocolate garnish.


Mint Swiss Meringue Buttercream
Makes about 3 cups

3 egg whites
1 cup granulated sugar
3/4 cup unsalted butter, room temperature
1 1/2 teaspoons peppermint extract
1/4 teaspoon vanilla extract

Put egg whites and sugar in a double boiler over simmering water. Whisking constantly, cook until sugar has dissolved and mixture is warm (about 160 degrees).

Pour heated egg mixture into a clean bowl of a mixer fitted with the whisk attachment. Beat egg white mixture on high speed until it forms stiff (but not dry) peaks. Continue beating until fluffy and cooled, about 6 minutes. (It's very important to beat it for the whole 6 minutes.)

Switch to the paddle attachment. With the mixer on medium-low, add butter several tablespoons at a time, beating well after each addition. (If frosting appears soupy or separated after all butter has been added, beat on medium high speed until smooth again, 3-5 minutes more.)

Beat in all extracts. Reduce speed to low; beat 2 minutes to eliminate air bubbles. Stir with a rubber spatula until smooth.

Sunday, February 28, 2010

Box of Chocolates


Ahhhhhh, sweet February, commonly thought of as the month of love. How perfect would it be to offer a sweet box of chocolates to your sweetheart? Yes, I know that Valentine's Day has come and gone, but I still have one more day before it is no longer the month of February and I'm sticking with the love theme until the last possible minute.

I actually made these tasty treats back in August for the celebration of our 15th anniversary. Imagine how hard it is to find pink and red candies and a heart shaped chocolate box in the month of August. The guy at the local candy store finally had pity on me and let me buy one individual chocolate instead of one pound of chocolate so that I could buy a velvet heart shaped candy box.

So what is so special about these chocolates . . . they are cupcakes, of course. The idea is from the book Hello Cupcake which has sooooo many fun cupcake ideas. Since my husband is not a huge fan of chocolate I decided to make the mini cupcakes using a yellow cake mix. The back of the book has several different recipes for homemade cupcakes as well as ways to spruce up boxed cupcakes. I used both dark chocolate and milk chocolate frostings. The dark chocolate frosting was warmed in the microwave to make it look more like a ganache and then the edges were rolled in colorful jimmies. The milk chocolate frosting was smoothed over the top of the cupcakes and then large marshmallows, cut in half and then dipped in dark chocolate, were added to the top and then swirled with milk chocolate or vanilla frosting.

These were so fun to make and I enjoyed seeing my husband's face when he saw these sitting on the table the next morning. Don't you love it when you are able to do something that comes as a complete surprise to the recipient.